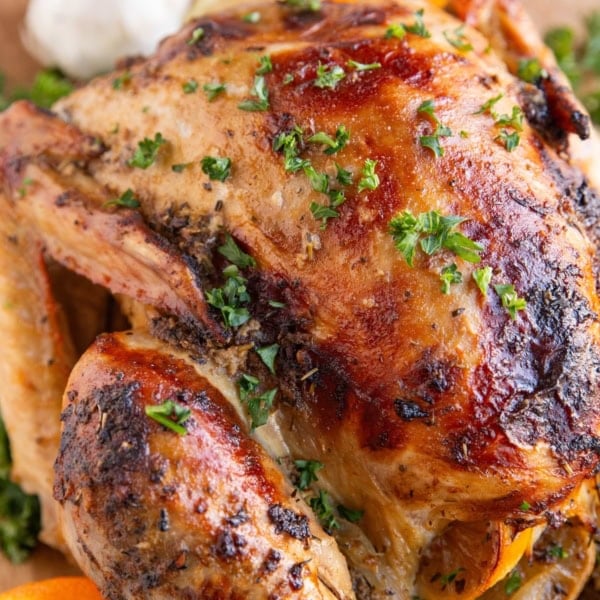
Amazingly tender Instant Pot Whole Chicken couldn’t be any easier to prepare! For those of you who love roast chicken or rotisserie chicken, you’ll love this super straightforward goof-proof recipe that yields a stellar result every single time!
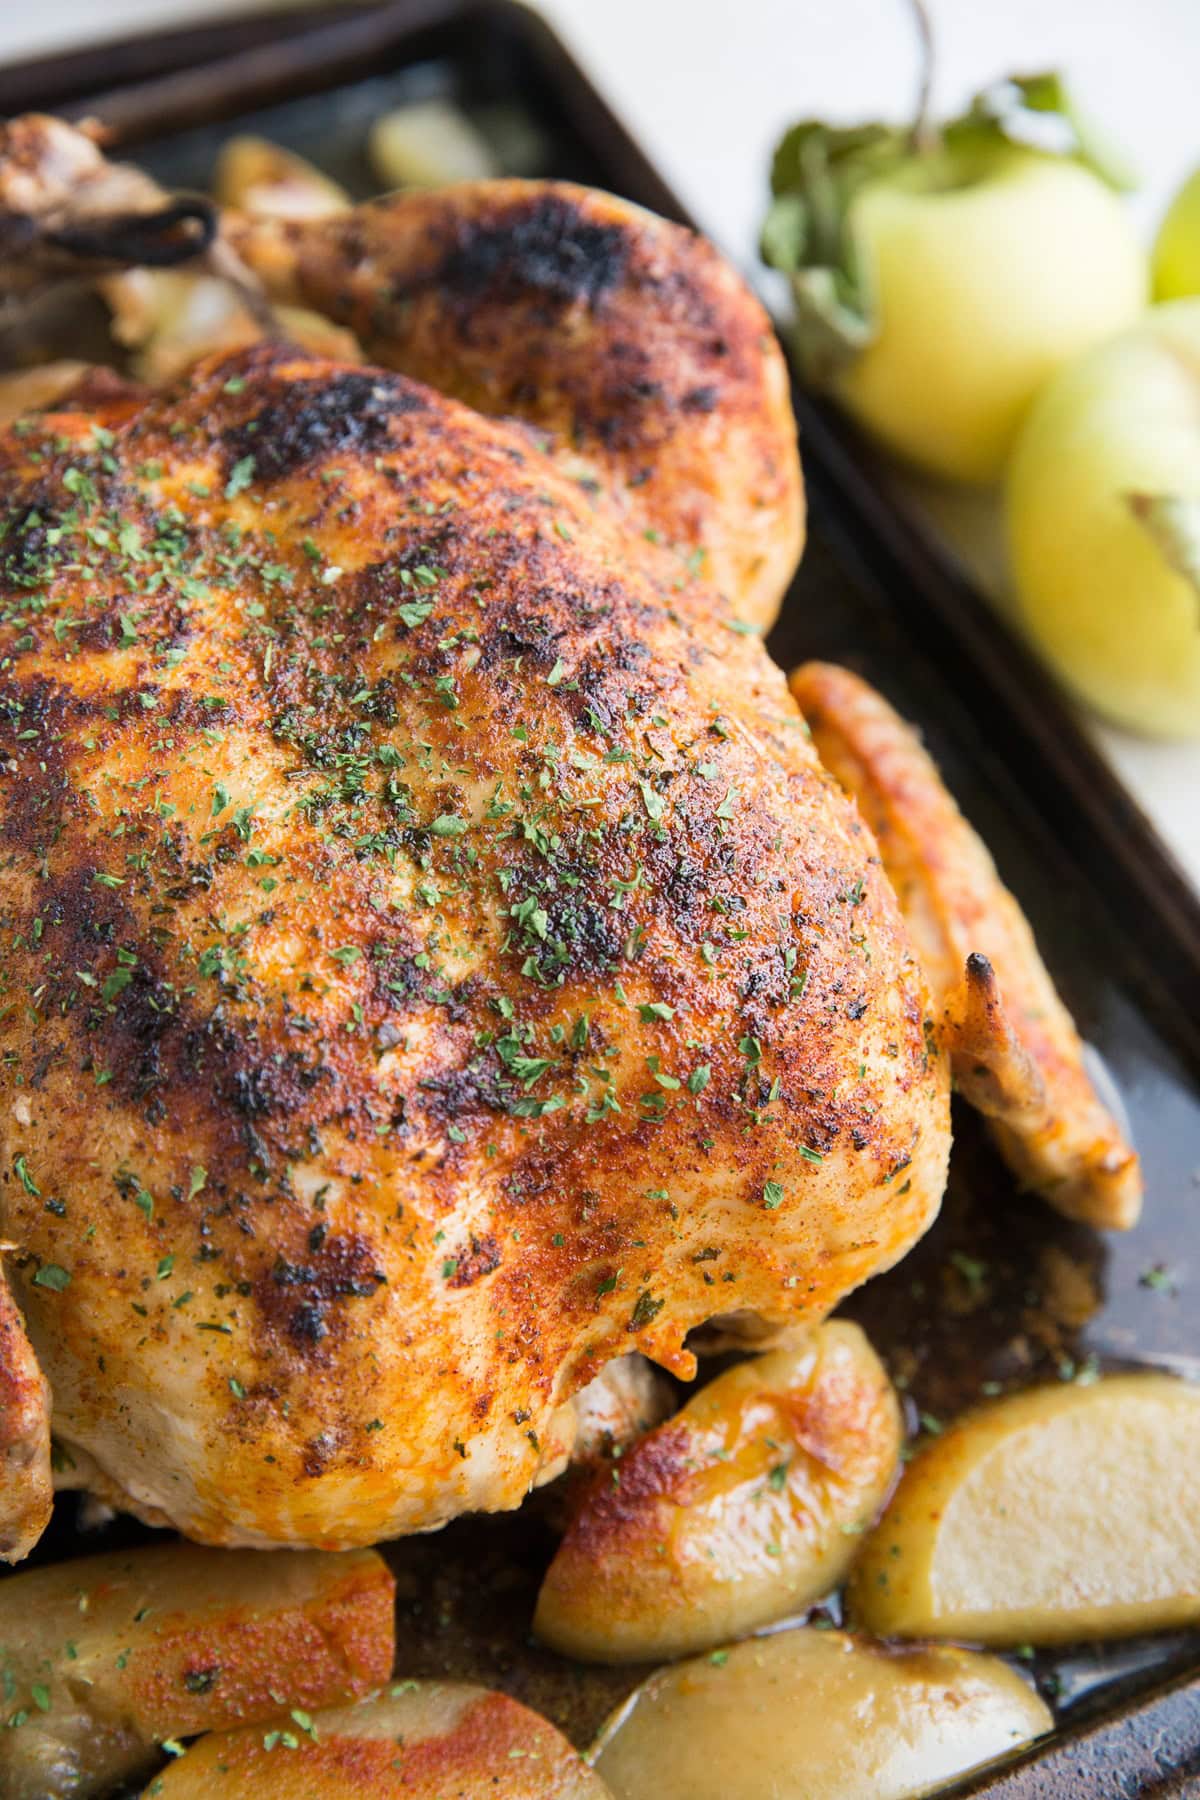
Have you ever made a whole chicken in the electric pressure cooker?
It may sound strange. Perhaps unappealing. You could be thinking to yourself, “Yeah, that’s something I’d never do.”
Trust me on this one. It will change your life.
I love it so much that this is my preferred method for cooking a whole chicken. You’ve seen it before in my Instant Pot Garlic Herb Rotisserie Chicken and my Instant Pot Turmeric Chicken.
The chicken turns out amazingly tender. It falls right off the bone, just like rotisserie style chicken…but even more tender still!
Plus, it’s ready in a fraction of the time.
You will never roast a chicken in the oven again, it’s that good.
If you’re like me and you find boneless skinless chicken to be a real drag, you will absolutely love this Instant Pot Whole Chicken recipe using a whole bird.
So much flavor, so incredibly easy, no second guessing or funny business…it’s just a stick it in the pot and off you go sort of situation.
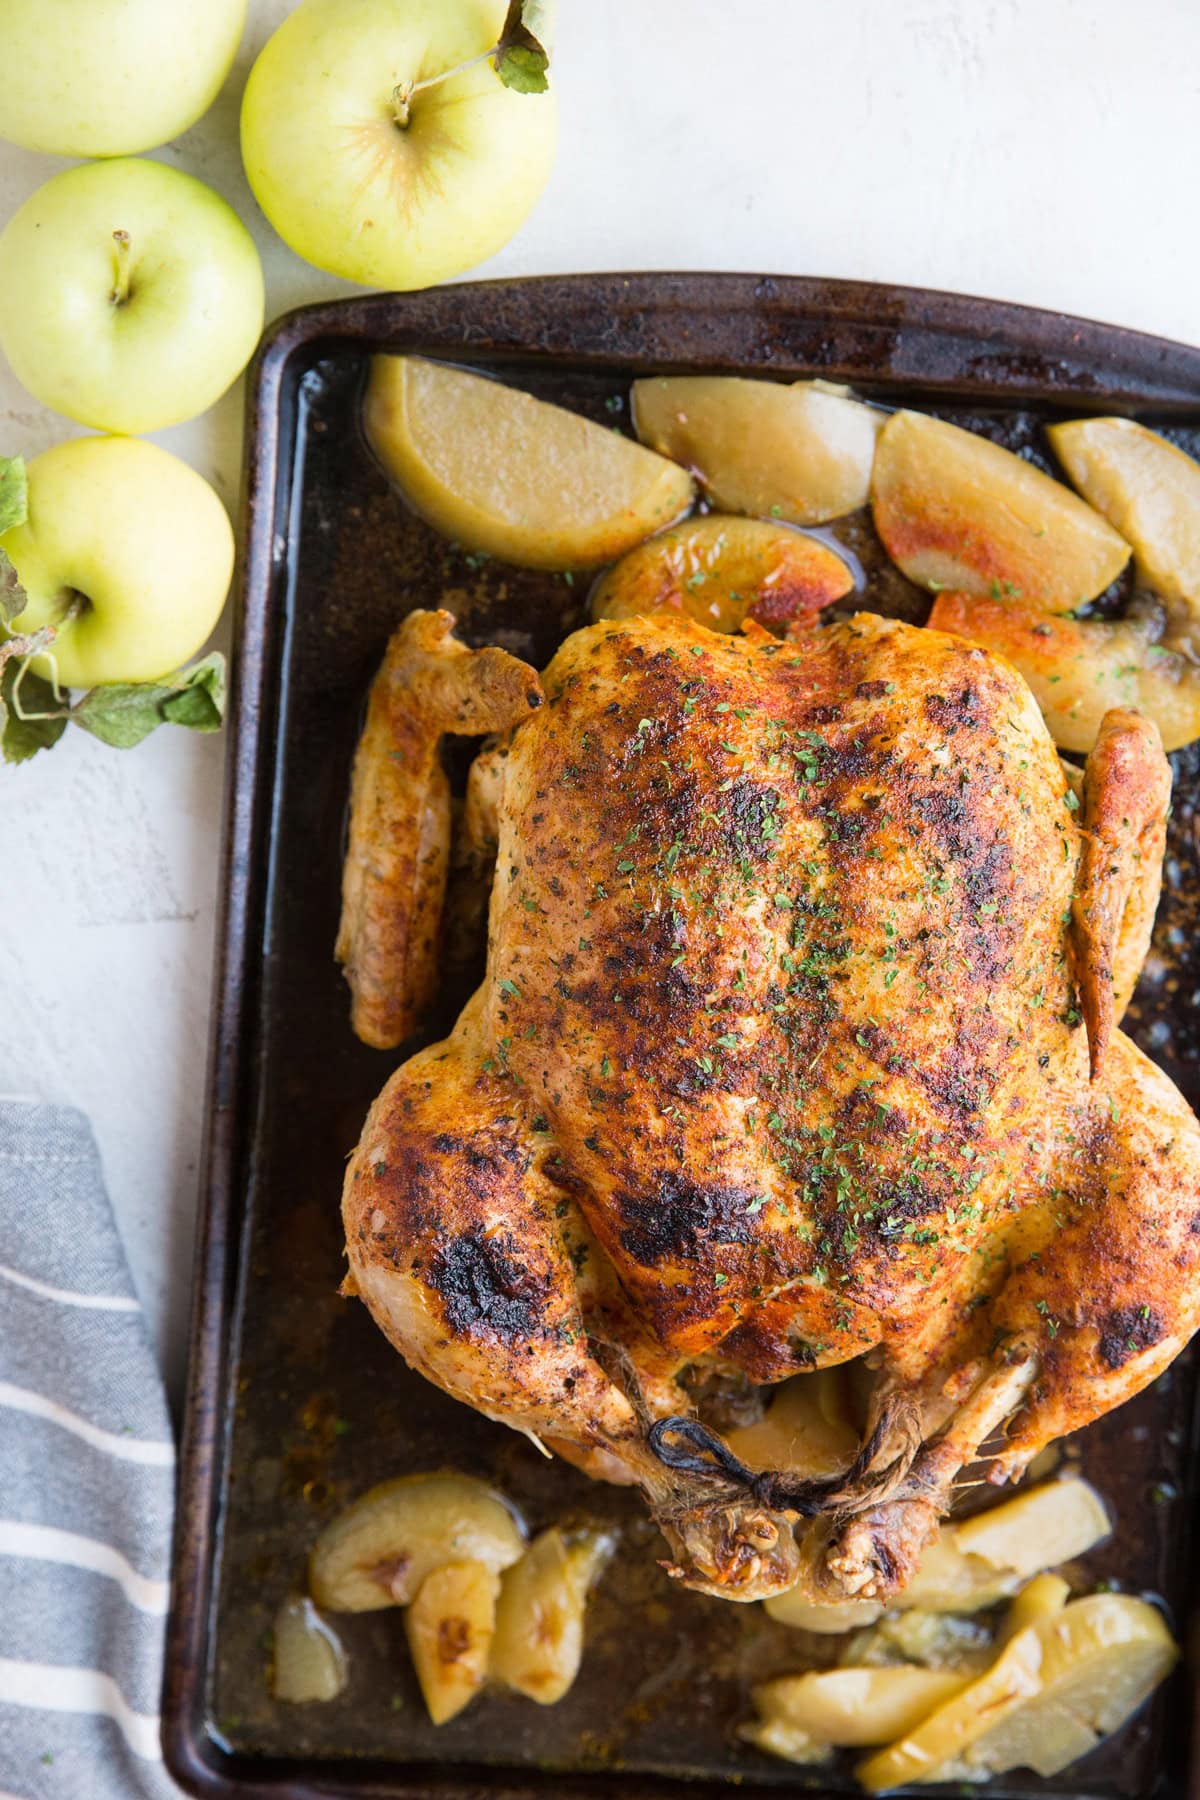
Crispy chicken skin is quite the big deal in my house, as both my partner and I are obsessed with it. For this reason, I take the extra step after pressure cooking the chicken to broil it in the oven for a few minutes to get that crispy skin.
This gives us the best of all worlds – insanely juicy, tender, fall-off-the-bone amazing chicken with that incredible crispy skin.
Ingredients for Instant Pot Whole Chicken:
Whole Body Chicken: The star of the show! Pick up a whole chicken from the grocery store that is between 3.5 and 4.5 pounds. You’ll need to pressure cook the chicken on high heat for 6 minutes per pound.
Be sure the chicken is completely thawed before adding it to the pressure cooker for the best results and to ensure the chicken cooks through.
Apples (Optional): Because I’m a fan of the combination of chicken and apples, I added some chopped apples to the pressure cooker this time around. They become very tender and flavorful and pair nicely with a bite of that crazy tender chicken.
If you aren’t into apples, feel free to skip them! You could do onion if you’d like or just keep it simple and add nothing.
Apple Cider or Chicken Broth: You’ll need two cups of liquid for the pressure cooker to do its job. I used apple cider (not to be confused with apple cider vinegar!!) for the liquid, but you can easily use chicken stock, beef broth or even just water if you don’t have any juice or broth on hand.
Seasonings: Sea salt, paprika, garlic powder, black pepper, and dried parsley. This combination is so simple yet so flavorful! If you have onion powder on hand, feel free to use that as well. You can use any seasonings or rubs you like.
Let’s make it!
How to Make Instant Pot Whole Chicken:
Remove the chicken from its packaging and pat it dry with a paper towel. Pull any giblets out of the cavity of the chicken.
Drizzle the chicken with 1 to 2 tablespoons of avocado oil or olive oil and use your hands to smear it around so that the whole chicken is coated in oil.
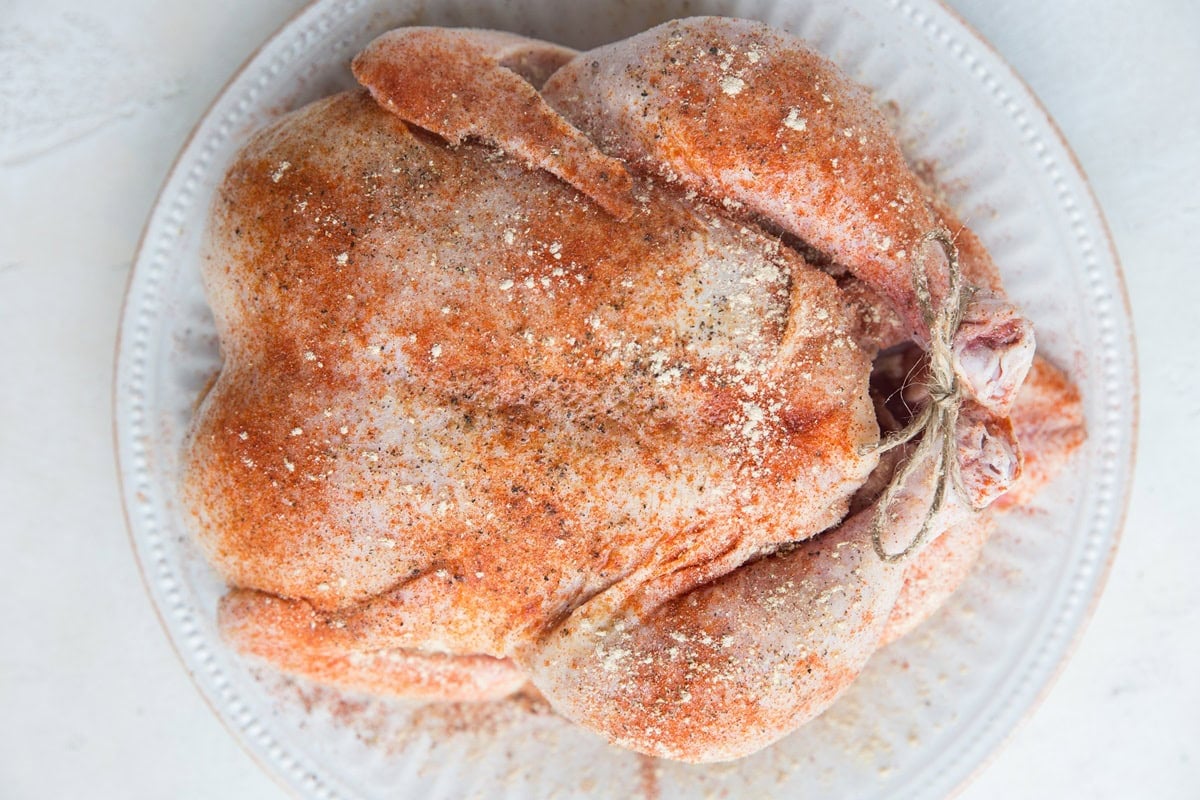
Sprinkle the chicken (both sides and all of the edges) with sea salt, paprika, garlic powder, black pepper, and dried parsley.
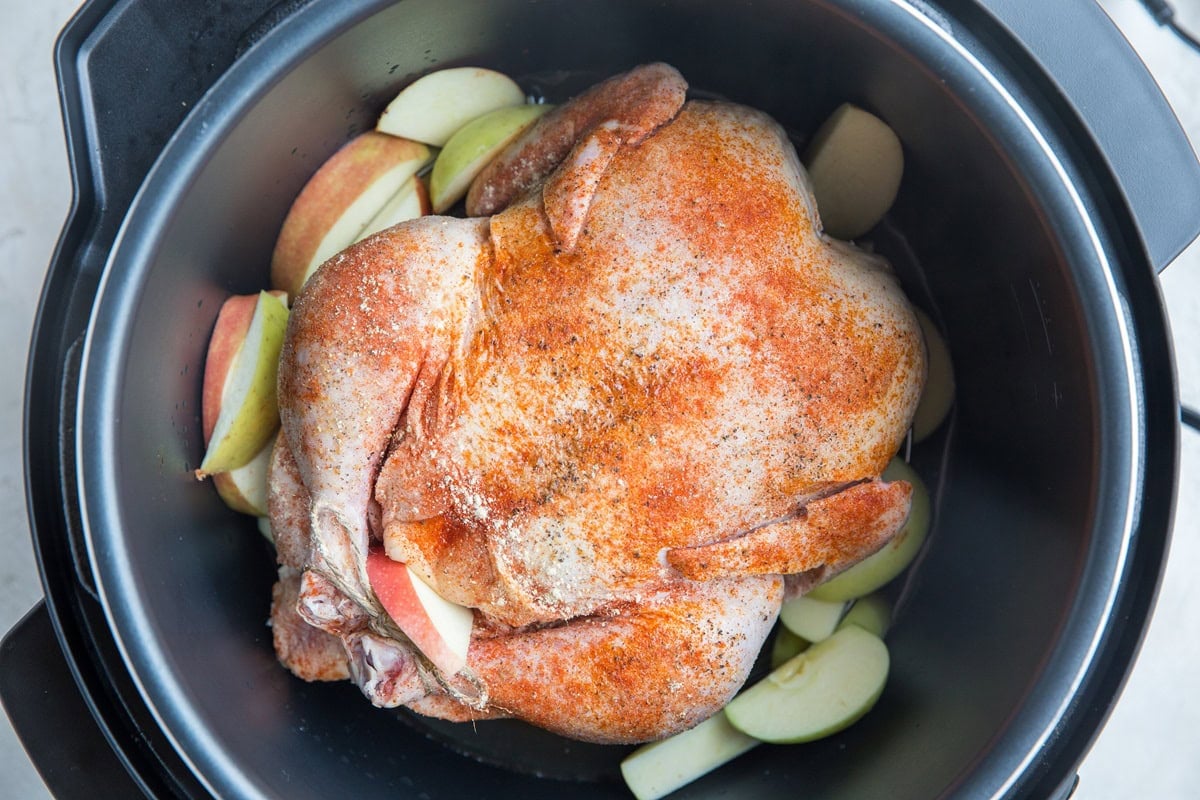
Pour the apple cider (or chicken broth) into the bottom of the pot and insert the trivet. Place chicken on top of the trivet. Add chopped apples and/or onions if you’d like.
Secure the lid on the pressure cooker and press the Manual Pressure or Pressure Cook button.
Adjust the time for 30 minutes (or 6 minutes per pound of chicken) and keep the quick release valve in the sealing position. Make sure your pressure cooker is set to its default mode of High Pressure.
Allow the pressure cooker to run its course – it will take 5 to 10 minutes to heat up before it gets going.
Once the time is up, allow the pressure cooker to naturally release (and go into keep warm mode) for at least 20 minutes. I often let mine go for 40 or 50 for the full natural pressure release.
Note: Chicken is cooked through when it reaches an internal temperature of 165 degrees F. Verify the internal temperature by poking the thickest part of the breast with a meat thermometer.
The exact cooking time depends on the size of your chicken but 6 minutes per pound on high pressure works great for the cook time, with the natural release.
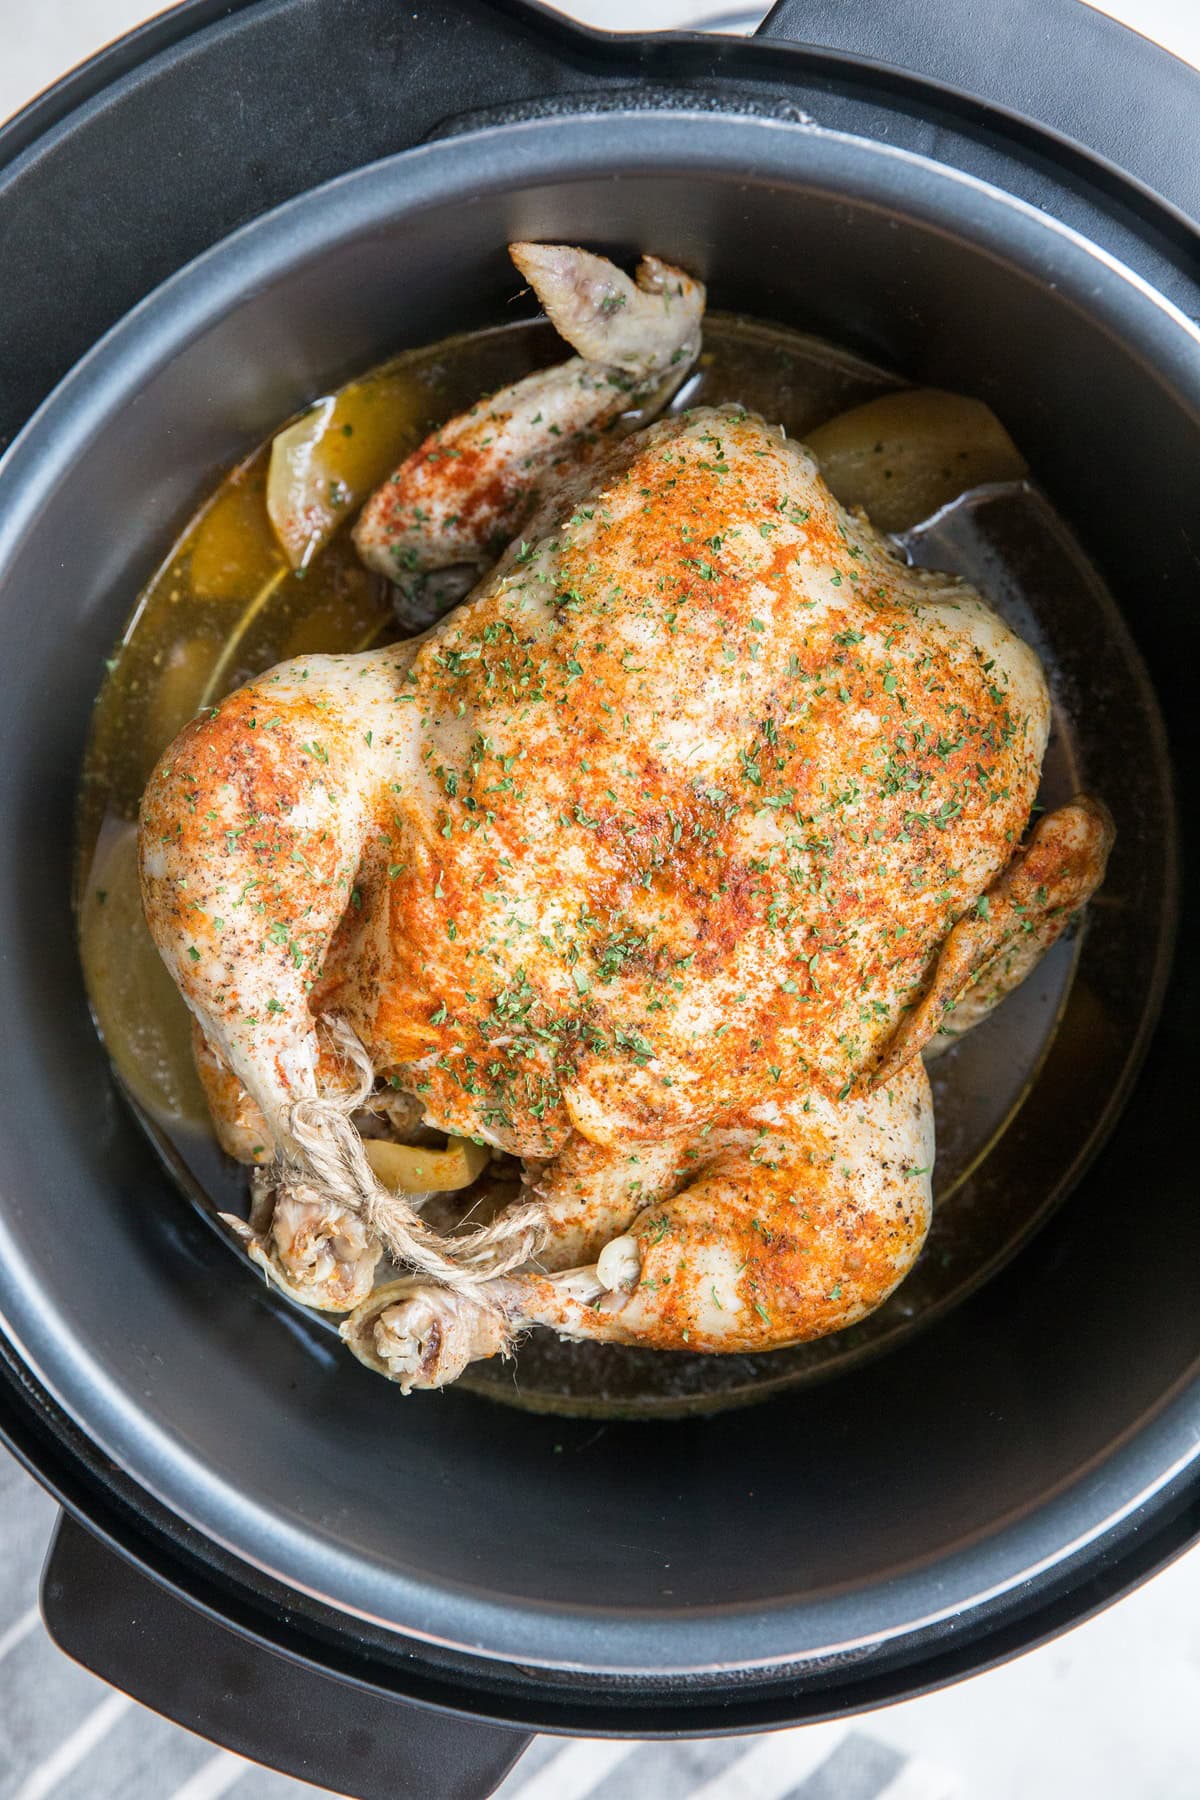
Remember that it is this process that helps make the chicken nice and tender, so while it will be fully cooked after the 30 minutes, for the juiciest, tenderest results, be sure to allow it to go through the natural release process.
Let the meat rest for at least 15 minutes before attempting to move the chicken.
Remove The Whole Chicken From The Instant Pot:
Removing the chicken from the Instant Pot is a bit of a to do. The chicken will be hot, and because it becomes very tender, it will feel like the whole thing will fall apart if you try to pick it up.
I use a spatula to get underneath the chicken to have some leverage to lift it out. I use one hand to pull it up with the spatula and the other hand to stabilize it. Transfer it to a cutting board to serve immediately or to a baking sheet to broil the skin to make it nice and crispy.
If you have an extra person around, one of you can use tongs to grab the trivet that’s underneath the chicken to lift it while the other person removes the chicken from the pressure cooker.
Of course, you can always pick pieces off the chicken while it is still hot in the Instant Pot and then remove the rest of it later as it cools off.
Serve the chicken with the cooked apples and/or onions if you added them along with any side dishes. I’m always game for brown rice and veggies with any animal protein entree.
Engineer a different way to get the hot chicken out of the pot? Let us know in the comments below!
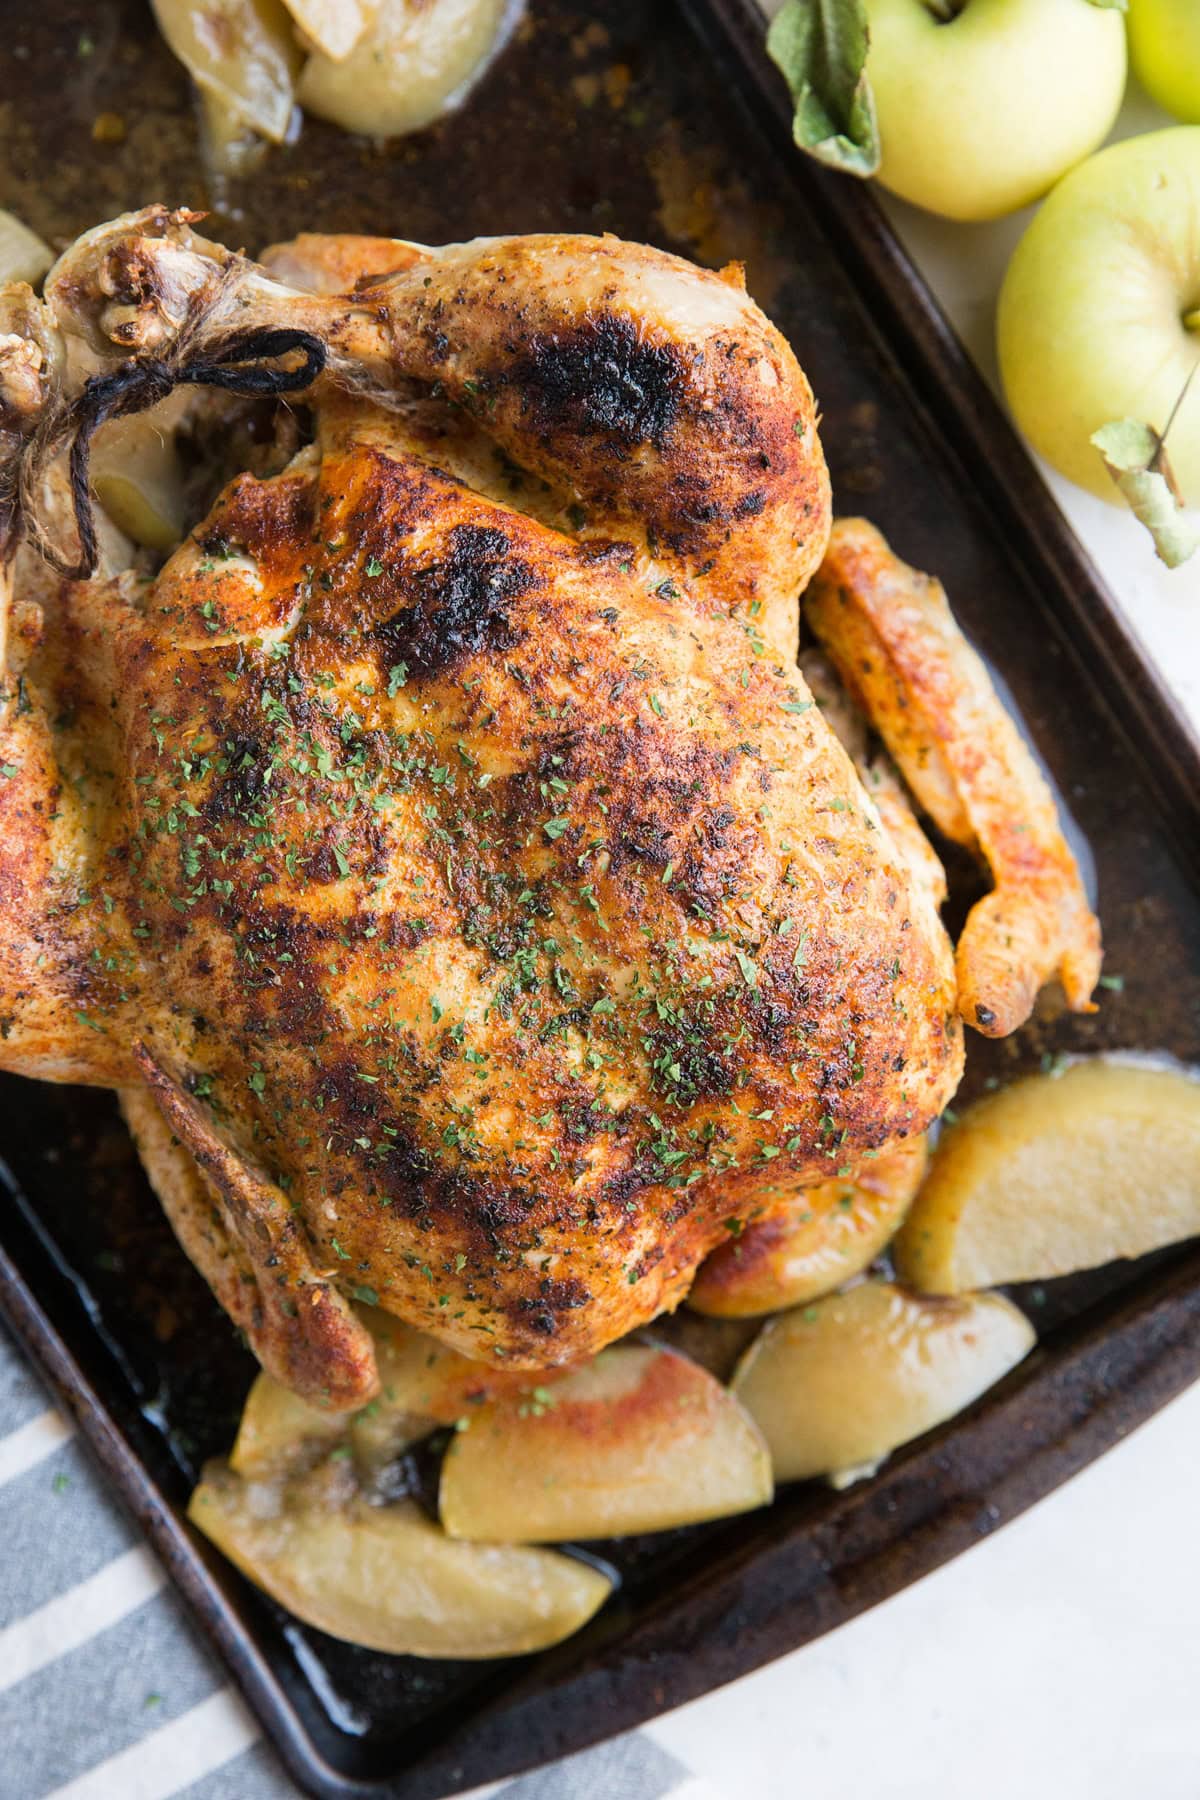
The juices left at the bottom of the Instant Pot are pure gold. You can serve the chicken with the juices or turn it into gravy if you’d like.
For Crispy Chicken Skin:
When you cook skin-on chicken in the pressure cooker, whether it be a whole chicken or chicken pieces, the skin turns out soft, even if you sear the chicken before pressure cooking it.
For those of us who love crispy chicken skin, get this! You can easily achieve crispy skin by broiling the chicken in the oven after it is finished in the pressure cooker.
Simply transfer the whole chicken to a large cookie sheet, turn your oven on the high broil setting, and place the chicken on the shelf that’s second from the top for 5 to 8 minutes, or until the skin is golden brown and has reached your desired level of crisp.
Store leftover meat in an airtight container in the refrigerator for up to 7 days.
I love making chicken salad or chicken soup using leftover chicken.
That’s it! Everything you need to know about making the perfect, finger-lickin-great Instant Pot Whole Chicken! This is a fabulous meal prep recipe and also perfect for feeding the whole family.
Let me know how you like it, and if you change it up to use different seasonings or ingredients, let me know what you try!
If you love Instant Pot recipes, also try my Instant Pot Paleo Pumpkin Chili, Instant Pot Beef Stew, and my Instant Pot Steak and Potato Soup!
Instant Pot Whole Chicken forever!

Instant Pot Whole Chicken Recipe
Equipment
Ingredients
- 1 whole chicken 3.5 to 4.5 lbs
- 1 Tbsp avocado oil
- 1 1/2 tsp sea salt
- 2 tsp garlic powder
- 1 1/2 tsp Paprika
- 1 1/2 tsp Dried parsley
- 1/2 tsp black pepper
- 2 cups apple cider juice or chicken broth*
- 2 large apples chopped, optional
Instructions
- Remove the chicken from its packaging and pat it dry with a paper towel. Reach into the bird's cavity and remove any organs. Drizzle the chicken with 1 to 2 tablespoons of avocado oil and use your hands to smear it around so that the whole chicken is coated in oil.
- Sprinkle the chicken (both sides and all of the edges) with sea salt, paprika, garlic powder, black pepper, and dried parsley.
- Pour the apple cider (or chicken broth) into the bottom of the Pressure Cooker , add the apples and any veggies (such as onion, carrots, etc) and insert the trivet. Place the chicken on top of the trivet.
- Secure the lid on the pressure cooker and press the Manual Pressure or Pressure Cook button. Adjust the time for 30 minutes (or 6 minutes per pound of chicken) and keep the pressure valve sealed. Allow the pressure cooker to run its course – it will take 5 to 10 minutes to heat up before it gets going.
- Once the time is up, allow the pressure cooker to naturally release (and go into keep warm mode) for at least 20 minutes. I often let mine go for 40 or 50 for the most tender result.
- If you love crispy chicken skin, transfer the chicken to a baking sheet and place your oven on the High Broil setting. Place the chicken on the rack that's second from the top and broil for 5 to 8 minutes, or until the skin has reached your desired level of crisp.
- Serve with your choice of side dishes and enjoy!
Video
Notes
Nutrition







Absolutely delicious! I will definitely be making again. Better than any ip recipe
I have ever had! Yummy 🤤
Aww amazing! I love hearing that, Erin! I appreciate the feedback 🙂
Thank you for teaching an old dog new tricks! I sincerely appreciate your willingness to share this information with the masses. This is simple, fast and delicious!
My pleasure, Barbara! I’m happy you find the recipe to be useful! Thank you for the sweet note 🙂
Hi there – I usually make chicken bone broth in my instapot with the leftover roast chicken carcass – I’m wondering if the chicken carcass would still be good to use for this afterwards or has it already lost all it’s nutrients in the first pressure cooking round? Thanks =)
Hi Melanie! This is a great question. I’m actually not sure. I imagine a chicken that has been roasted will still have quality nutrients in the bones, but to your point, it might be a bit of a lost cause with the pressure cooker version. One option would be to add some extra liquid to the instant pot and use the residual liquid from cooking the chicken as bone broth. Nevertheless, if you try making bone broth after the fact, let me know how it turns out!
This was a big improvement over the previous whole IP chickens I have made despite, the fact that I misread the directions and unplugged the IP right after the pressure cooking was over. I then let it sit for an hour before opening the pot and serving. The chicken was incredibly moist and tender, even the breast. . . . Something I have found helpful is to use a large sturdy cooking spoon or fork inserted into the cavity to help with lifting and guiding the chicken to the platter
I’m happy to hear it all worked out for you, TJ! Unplugging it is fairly similar to allowing it to go through a natural release process anyway, so your instinct was accurate! Thanks for the input about getting the chicken out of the IP! It seems like there have been some crafty methods in the comments…love it! 🙂
This chicken was fabulous, a keeper for sure.
Wahoo! Thanks so much, Karen!
Just tie some butcher string to the trivet and loop it over the chicken?
That might just work! I love the creative engineering. Let me know if you try it 🙂
Holy smokes. Absolutely delicious. The most painful part was waiting for the cooker to depressurize.
The house smells amazing. Meat is literally fall off the bone. The stock in the bottom is worth saving. For soup or cooking.
Effortless recipe.
I tried taking it out with tongs. Ha. Jokes on me.
100% making this again.
I just used stock, carrot, celery, onion, garlic, thyme, rosemary, parsley (whatever’s in the fresh chicken herb blend) and seasoning.
We just got the instant pot yesterday. Great first time experience
The first time I made the recipe, I tried taking the chicken out with tongs too, lol. It’s truly incredible how tender the meat turns out!! Thank you for sharing your additions! xo
To get the trivet out of the pot, I bought two inexpensive potato mashers and cut out the center part to create hooks to get under the trivet. They work great.
To get the rivet out of the pot, I bought two inexpensive potato mashers and cut out the center part to create hooks to get under the trivet. They work great.
Love that! Thanks so much for sharing, Darlene! xo
Making this now … hope it is as good as people say it is…. I think you should put apple cider JUICE in your recipe so people don’t get confused …
Hi Sue! I hope you enjoy it! That’s great advice. Cider and juice are different, so I hesitated to make the change, but I think you’re right – specifying “juice” might help alleviate some confusion. xo
I stupidly put apple cider vinegar before I realized my error! I wonder what this is going to taste like! I used one cup apple cider vinegar and one cup chicken broth. Oh dear! It was too late to do anything about it….
Hi Elizabeth! Oh no! I hope it turned out okay with the vinegar! You definitely aren’t the first person to do this, if it’s any consolation. For the future, you can definitely use just broth for the recipe, or you can use apple cider as in the juice. Either way works!
Using my instapot for the first time. Can I use a slightly larger whole chicken? 5 1/4 lbs.
Hi Terry! As long as it fits in your Instant Pot, you can use it! Just remember to cook it for about 6 minutes per pound of chicken, so about 33 minutes on high pressure. Hope you love it! xo
Easiest way to cook a chicken fast and with little mess!
I’m happy to hear you enjoy it, Julia! xo
Just wanted to mention that the first time I tried this recipe I took a chance on a tallcan of alcoholic apple cider. I do NOT recommend this! The alcohol really permeates the chicken in a somewhat unpleasant drunken manner. If you do try with alcoholic cider I recommend bringing it to a boil alone in the pot for a few minutes on sauté mode, then cancelling and proceed with the recipe from there. If you don’t remove some of the alcohol first it’ll just recirculate in the pressure cooker and pervade the taste of everything. I think also when alcohol is present it acts like a solvent and pulls some of the less appealing tastes into the meat.
Second try I couldn’t find anything non alcoholic labelled cider in the grocery store, but there was “unfiltered unsweetened apple juice” which I think is basically cider pasteurized for more shelf stability (so they can’t call it cider but basically the same). Turned out very tasty. I used two Granny Smith apples in the cooking liquid and also cut up a turnip.
Thanks so much for sharing your experience, Charles! I hadn’t tried the recipe with alcoholic cider and now I know it isn’t worth the gamble, so I appreciate you being the official tester and reporting back! I’m thrilled you enjoyed the recipe with regular unsweetened apple juice – it sounds like what you found is pretty similar to what I use. Thanks a bunch for the sweet words and for your thorough review! xo