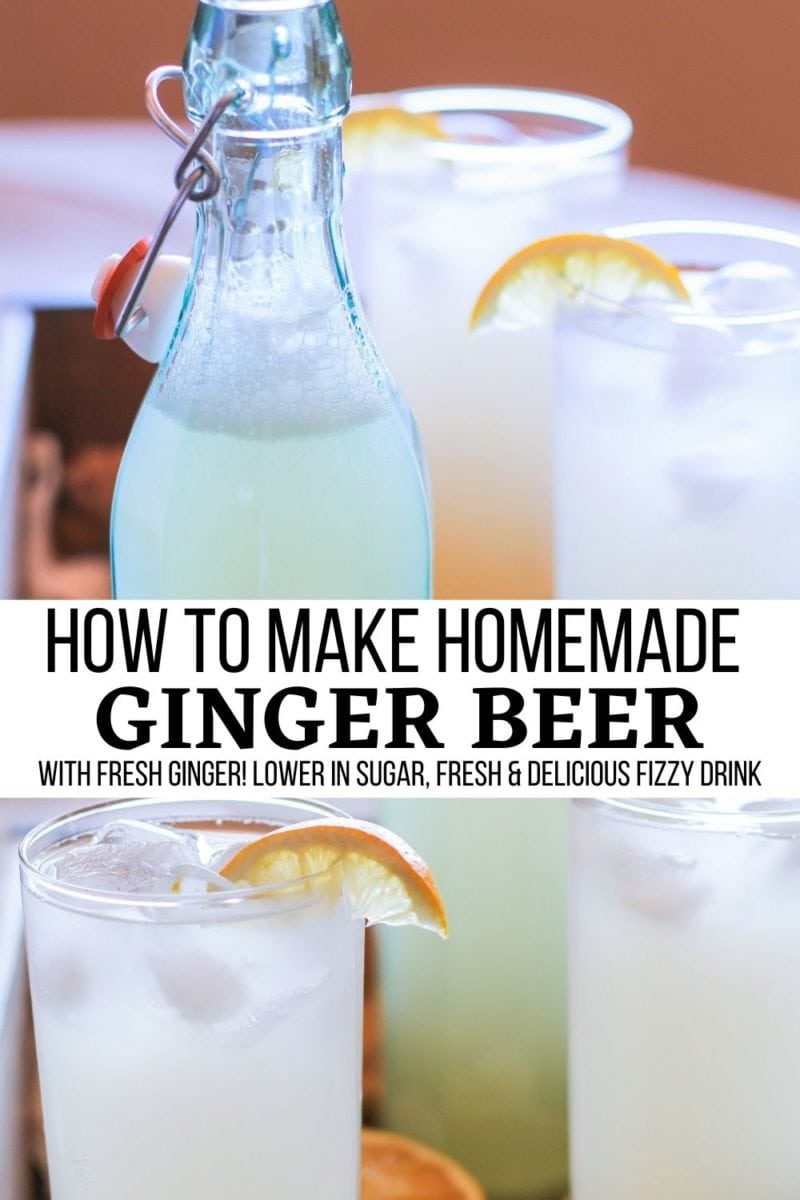
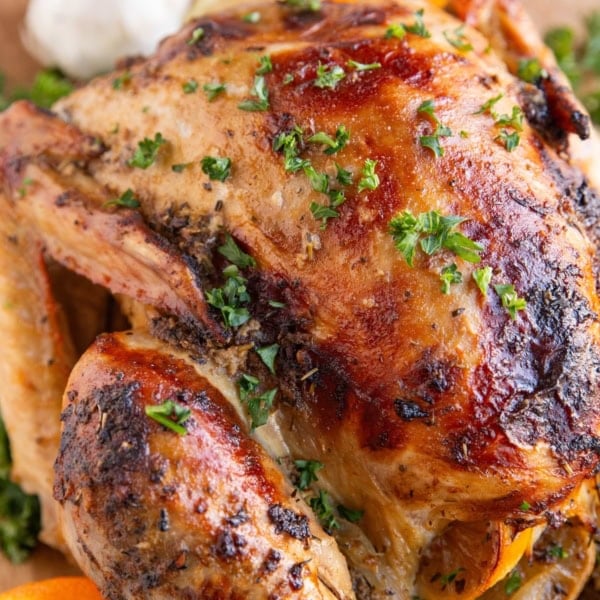
How to make homemade ginger beer, including photos and a video! This simply recipe is lower in sugar than store-bought ginger beer, contains vitamins and probiotics, and is a healthier alternative to most carbonated drinks because it contains less sugar and no carbonated water.

Ginger beer has been all the rage for years, and for a very good reason.
The sweet and spicy beverage is tasty by itself and adds pep to all sorts of cocktails and mocktails. If you’re anything like me, you could add ginger beer to all of your cocktails from now until doomsday.
Most of us think of ginger beer in the context of the Dark n’ Stormy or Moscow Mule and other cocktails that involve the brew. But did you know you can make a stellar homemade ginger ale at home, and not only is it easy, but it’s also great for you?
Because we like to do things in the legit-est of ways, we’re going to put on our DIY cap and learn how to make fermented ginger beer at home.
And it’s going to be healthier than the store-bought version, because that’s the way we roll.
Types of Homemade Ginger Beer Recipes:
There are several ways to make ginger beer.
Method #1: Most people make a simple syrup using ginger, sugar, and water, and then combine the simple syrup with soda water or seltzer water.
While this is the least time consuming way of making ginger beer, and definitely comes out tasting great, we can take it a step farther by fermenting ginger beer into a healthful drink so that it contains less sugar but still tastes sweet.
Method #2: The old fashioned way uses a “ginger bug” or “ginger starter,” which is ginger that has fermented in sugar and water to the point that its natural enzymes and probiotics are released.
Once a ginger bug is formed, it is then brewed into a batch of ginger brew, which results in a probiotic-rich effervescent drink.
This method of making ginger beer takes between 4 and 6 weeks, and is the method I describe in my cookbook, Delicious Probiotic Drinks.
I have also posted a tutorial on How to Make Probiotic Ginger Beer on this site for real ginger beer. Check it out if you’re looking for a beverage with a higher concentration of probiotics.
It is also an alcoholic ginger beer that has a tiny amount of alcohol but can be fermented in such a way that increases the alcohol content.
Method #3 (this recipe): The method I’m sharing in this post uses regular baker’s yeast.
The yeast consumes the sugar as it reproduces, which means that while the finished product tastes sweet, it is actually very low in sugar. Plus, it contains so much delicious ginger flavor!
Which Type of Ginger Beer To Make:
The quickest way is Method #1 listed above, which will require a recipe outside of this blog post.
Whether you choose to make this easy ginger beer recipe laid out in this post or my probiotic ginger beer is a matter of personal preference (and time).
For those of us who want ginger beer quickly, this easy version only takes 3 days from start to finish.
It still has health benefits from the yeast, but because it is not fermented for as long as the authentic version, it isn’t as probiotic-rich.
Is There Any Alcohol in Ginger Beer?
As with any fermentation process, a small amount of alcohol results.
The alcohol content in this ginger beer recipe is very low, almost non-existent.
Still, if you need to avoid alcohol, it is best to be safe and stick with a non-alcoholic ginger beer.
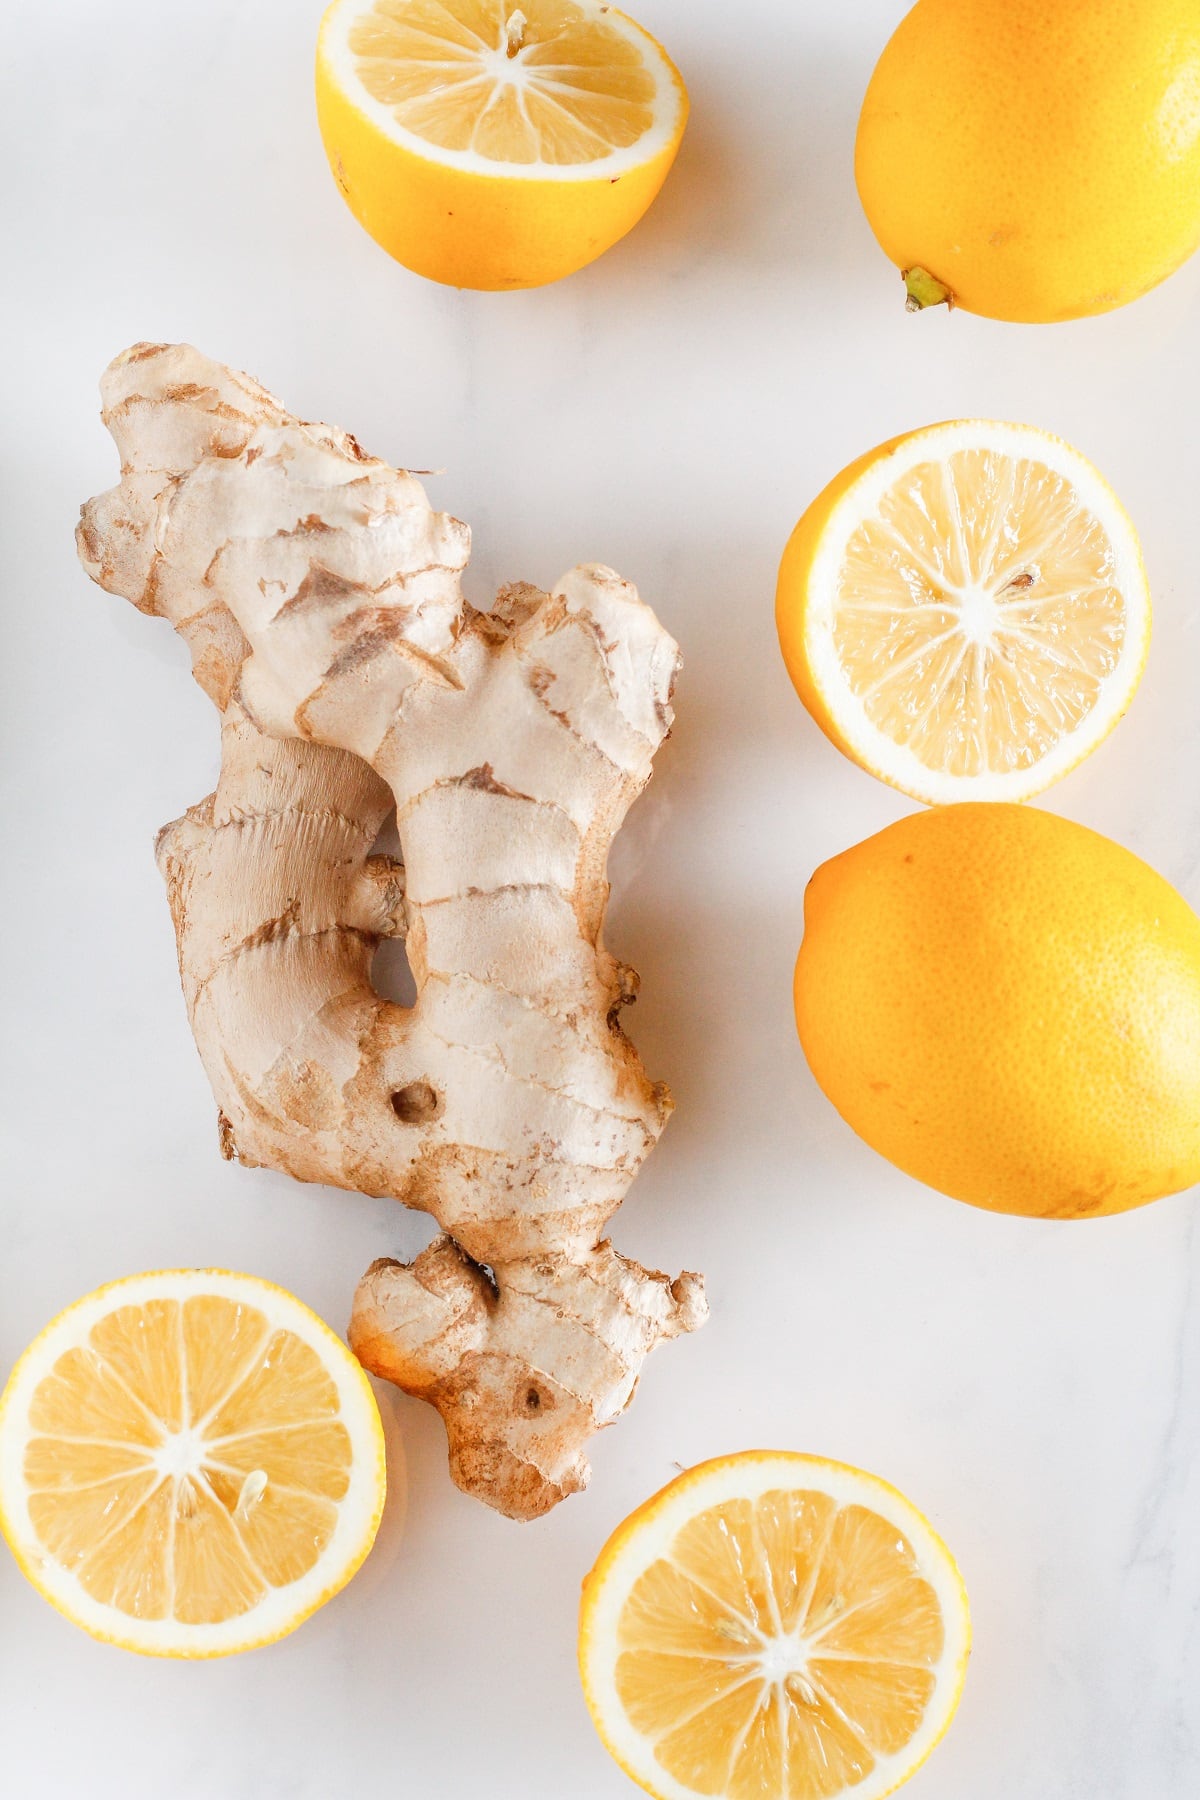
Ingredients Needed for Ginger Beer:
All it takes is fresh grated organic ginger, cream of tartar, lemon juice, active dry yeast, and cold water.
You can replace the lemon juice with lime juice if you’d like. I always go with organic fresh ginger root because it contains plenty of natural bacteria and natural yeasts for the best ginger beer.
Some people add brewer’s yeast (beer yeast) or champagne yeast to this recipe to boost the activity and alcohol content.
I don’t personally have experience with either one so can’t offer advice on how much to use or how to employ it, but if you’re interested in stepping up your brew, they are worth looking into!
I have also heard some people use sourdough starter to make ginger beer, but I have no experience with this either.
Health Benefits of Ginger Beer:
Ginger is a root and has been used as a natural remedy for upset stomach and nausea across many civilizations for hundreds of years.
It is a natural anti-inflammatory and digestive aid.
Studies show fresh ginger prevents and fights several types of cancer cells including breast, colon, ovarian, prostate, and lung cancer.
Ginger is also known for cleansing the body of toxic chemicals, as it is full of antioxidants.
When fermented, ginger releases enzymes and probiotics, which help maintain healthy gut microflora.
So is ginger beer really good for you?
Based on its ability to lower inflammation, aid with digestion, and boost your body’s immune system, yes, ginger beer is good for you.
Now that we have all of the details laid out, let’s learn how to make ginger beer!
How to Make Ginger Beer:
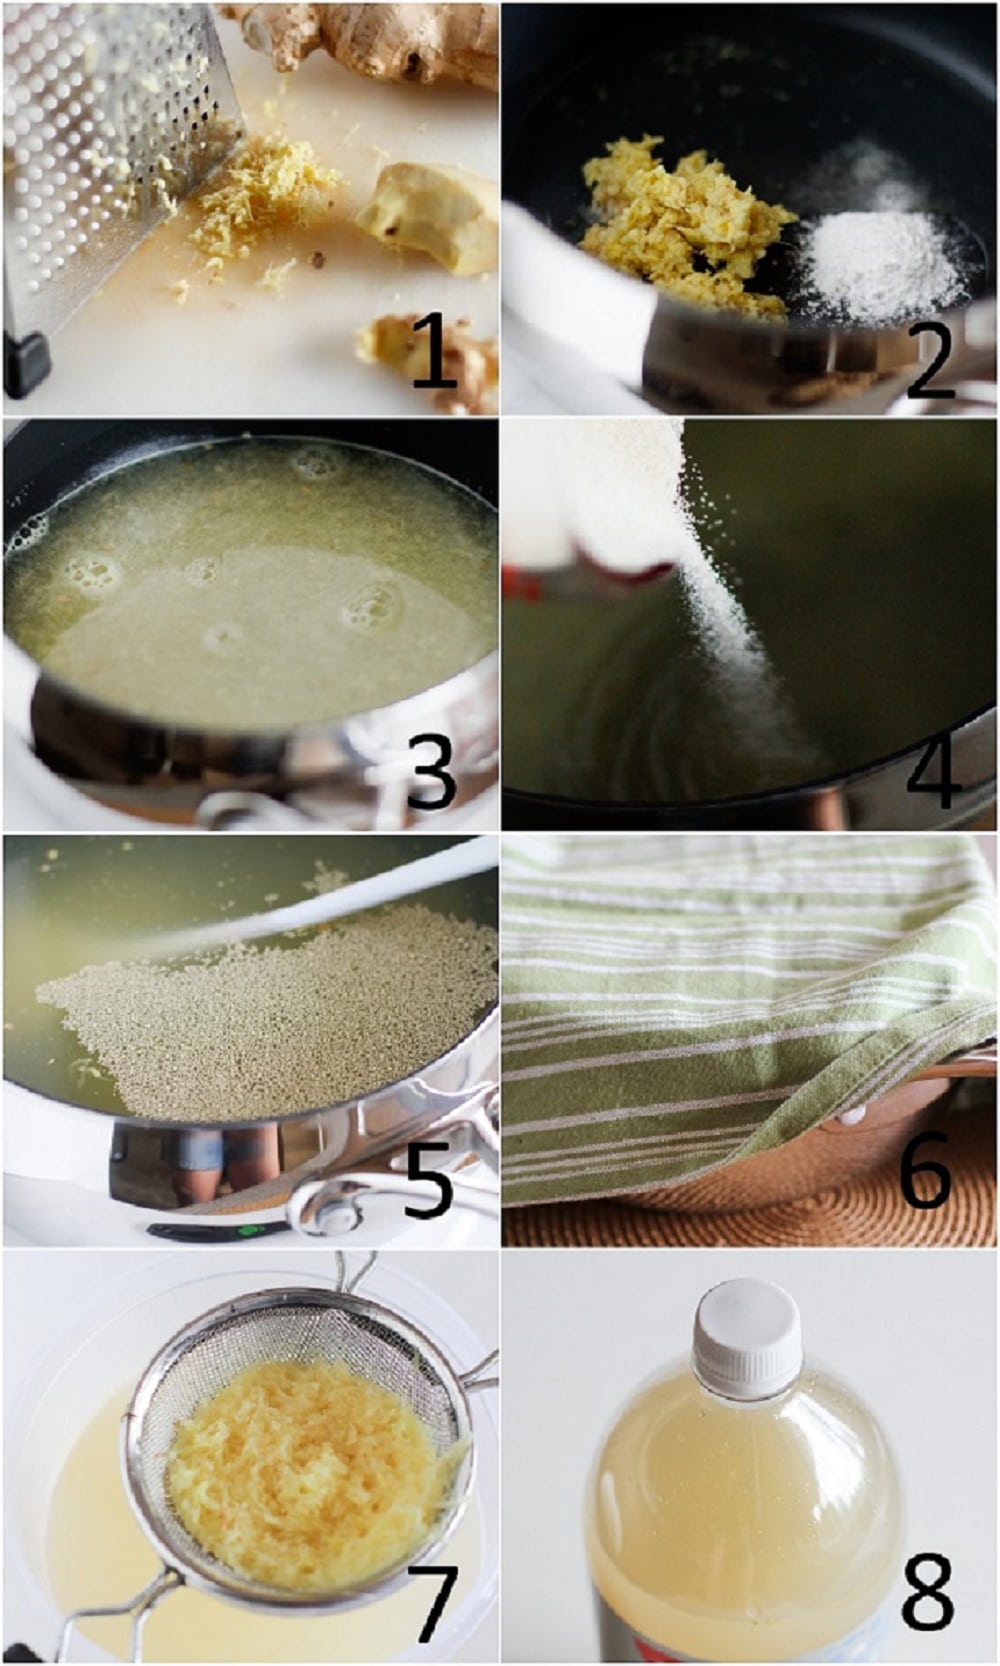
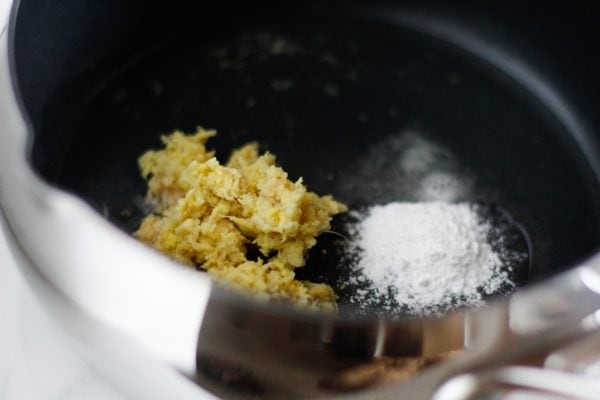
- Peel and grate the fresh ginger using a box grater. You want about 1/4 cup of grated ginger.
- Add the cream of tartar (1/2 teaspoon), lemon juice (1/4 cup), and ginger to a large pot.
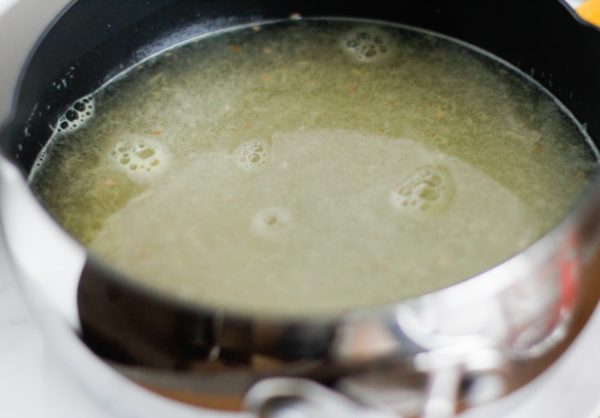
- Add 4 cups of water, and bring the mixture to a full boil.
- Turn the heat down to medium, add the sugar and stir until all of the sugar is dissolved.
- Add the rest of the cold water to the pot (5 cups) and allow it to cool to around 75 degrees Fahrenheit (23 degrees Celsius). Add the yeast (1 teaspoon), stir well.
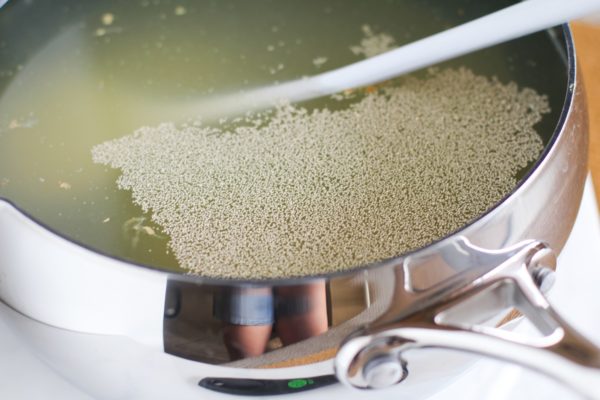
- Cover the pot with a kitchen towel and place in a warm, dark part of your house for 3 hours. The mixture should smell gingery and yeasty!
- Using a fine strainer, coffee filter, or a fine-mesh sieve, strain the liquid into a large pitcher to remove all the bits of ginger.
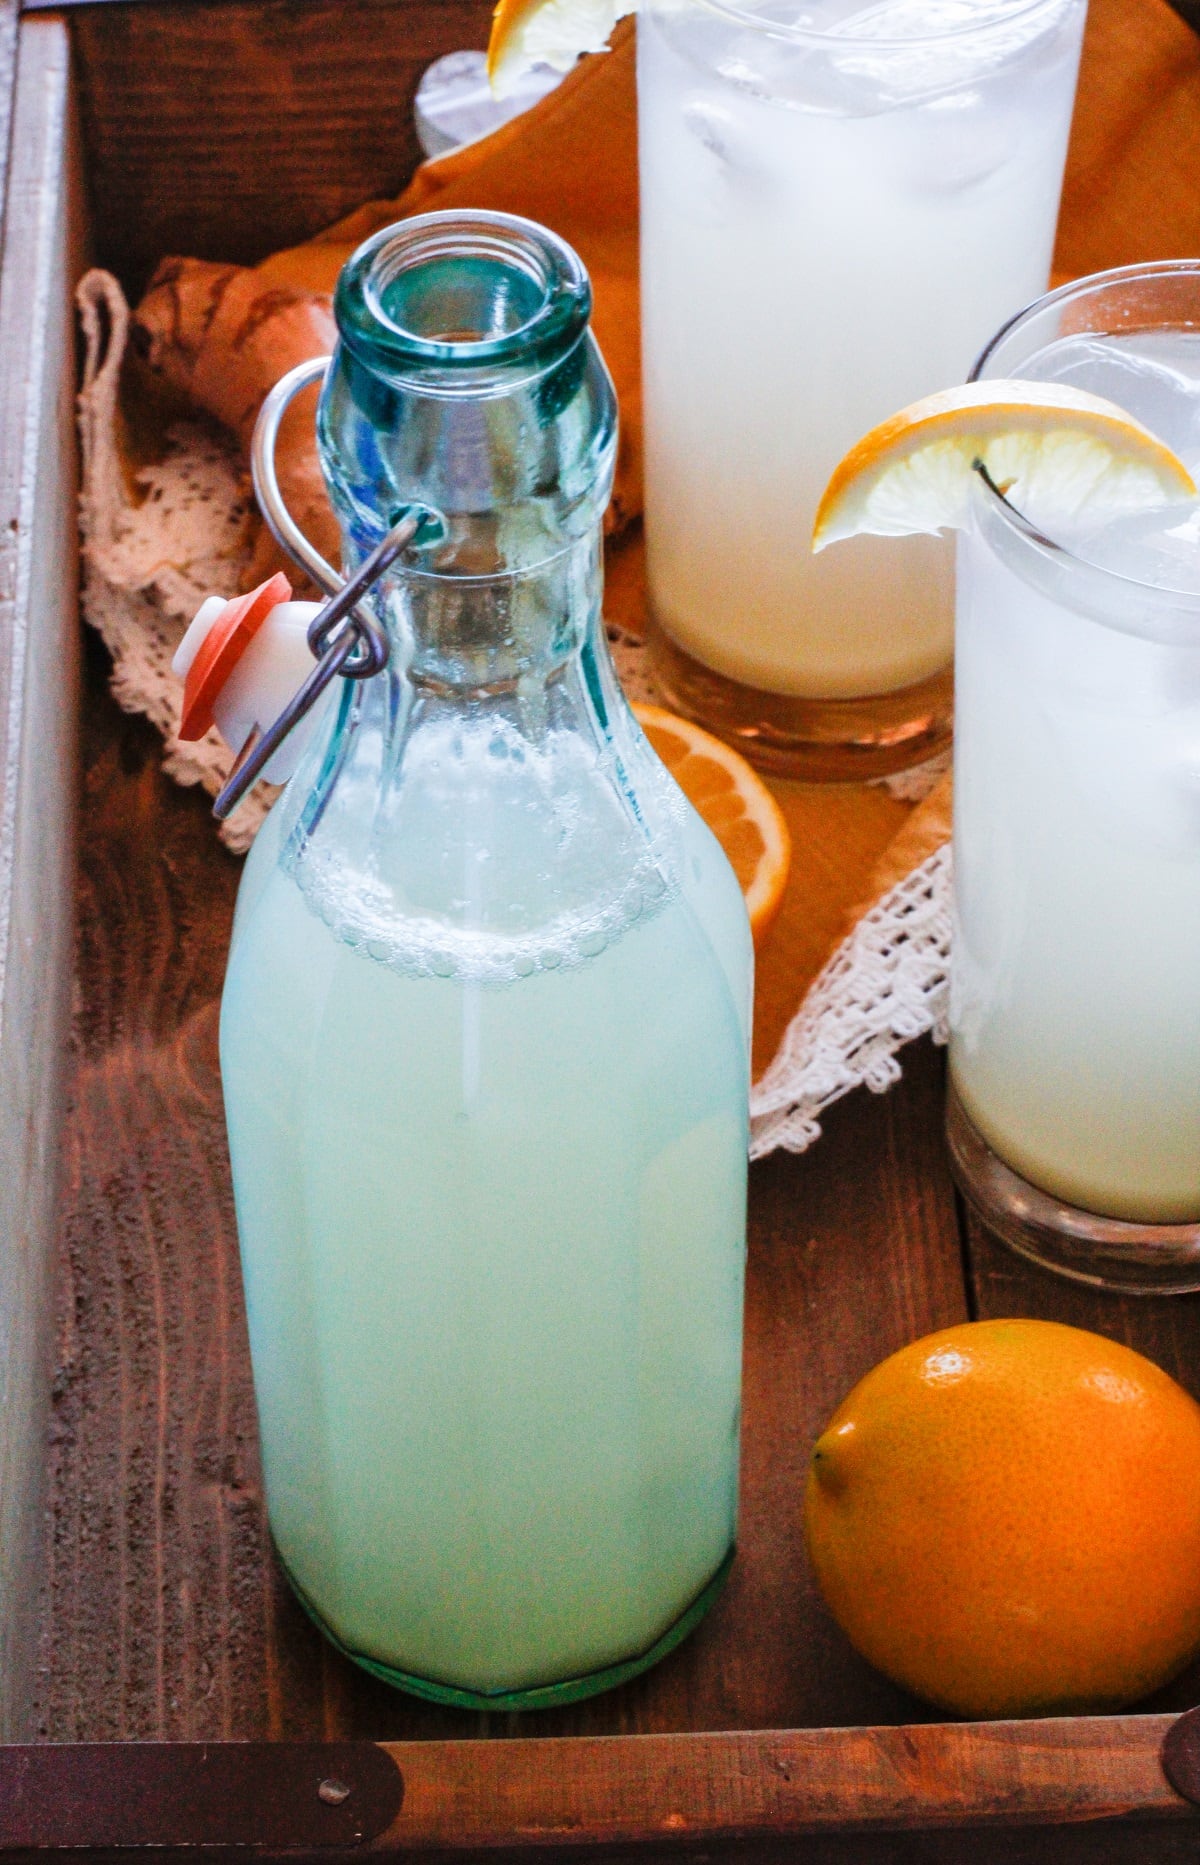
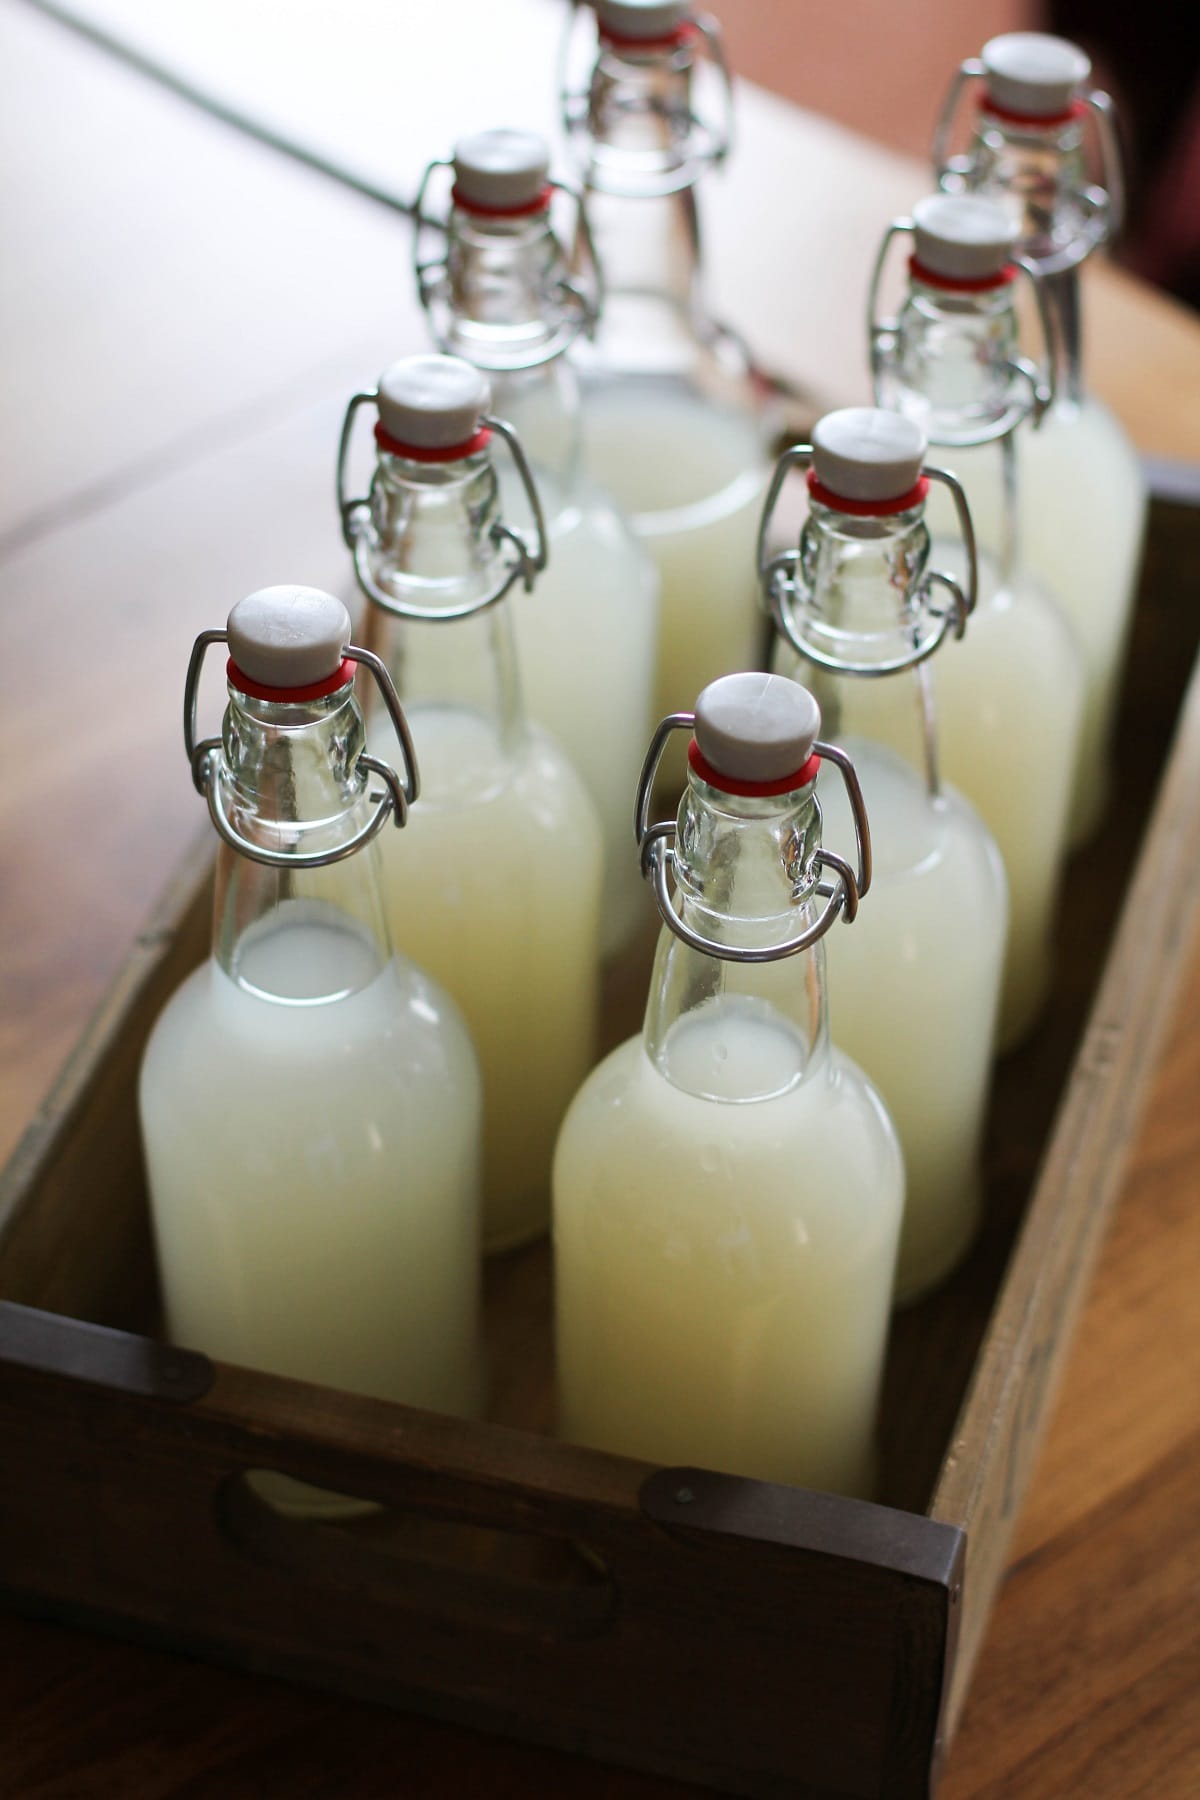
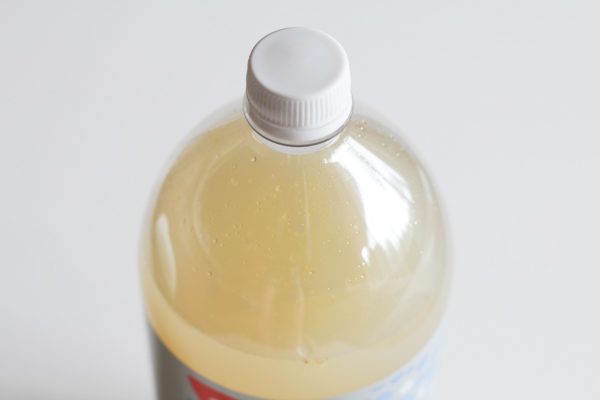
- Pour this strain mixture into a clean 2-liter plastic bottle. Empty soda water bottles work perfectly, and you can also use 2 one-liter bottles. Do not fill up the bottles all the way because the fermentation will yield carbon dioxide.
Place the plastic soda bottles in a dark place (ideally a warm room or warm place) for a couple of days.
One to three times a day, carefully loosen the caps to relieve some of the pressure without opening the bottles all the way.
The drink becomes very pressurized and fizzy, so skipping this step could result in a ginger beer bottle explosion. True story.
Be very careful in this process and do not point the bottles at anyone’s (or your own) face.
After your brew has finished fermenting, you can either add fruit, simple syrup, juice, or liquor to it to create a customized treat, or drink it as is.
If you choose to bottle the ginger beer in glass bottles, allow the ginger beer to lose much of its fizz prior to bottling, as it will continue to carbonate in the bottles.
This could result in them exploding if there is too much pressure.
Important Notes:
During fermentation, DO NOT use glass bottles, because the glass can explode under pressure (yes, it builds up that much pressure!), be sure to use plastic bottles with screw tops, as noted in the recipe, so that you can relieve pressure during fermentation.
After 24 hours, you will notice yeast colonies on top of the liquid and settled at the bottom. This is normal!
Once the ginger beer has finished fermenting, glass bottles may be used for bottling and storing.
You must be very careful when opening the bottles because the beverage will still be very carbonated. Always point glass bottles away from your face or anyone else’s face while opening.
The longer you allow the brew to ferment, the more sugar will be metabolized by the yeast, resulting in a less sweet, drier beverage.
I recommend storing finished ginger beer in the refrigerator and always away from direct sunlight.
Depending on the time of year and the room temperature, the brew may take more or less time to ferment. If the room is particularly cool, it could take an extra day or two to finish fermenting, whereas if it very warm, it could take less than 48 hours.
How to Make Sweeter, Spicier Ginger Beer:
If you prefer a sweeter beverage, consider fermenting the ginger beer for one to two days only or simply start with more sugar (about 1 1/4 to 1 1/2 cups instead of 1 cup) than you need.
For spicy ginger beer, start out with double the amount of ginger for a kick. Make your own ginger beer based on your personal taste!
How to Store Ginger Beer:
Once the ginger beer has finished its few-day brewing process, store it in the refrigerator for 10 days, or up to 1 month when left untouched.
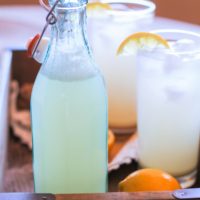
You can either store it in the same plastic bottle you used to brew it, or transfer it into glass flip cap bottles. I play it safe and store it in the same plastic bottle I use for fermentation.
Just note that the more you open the bottle, the more carbonation will be lost.
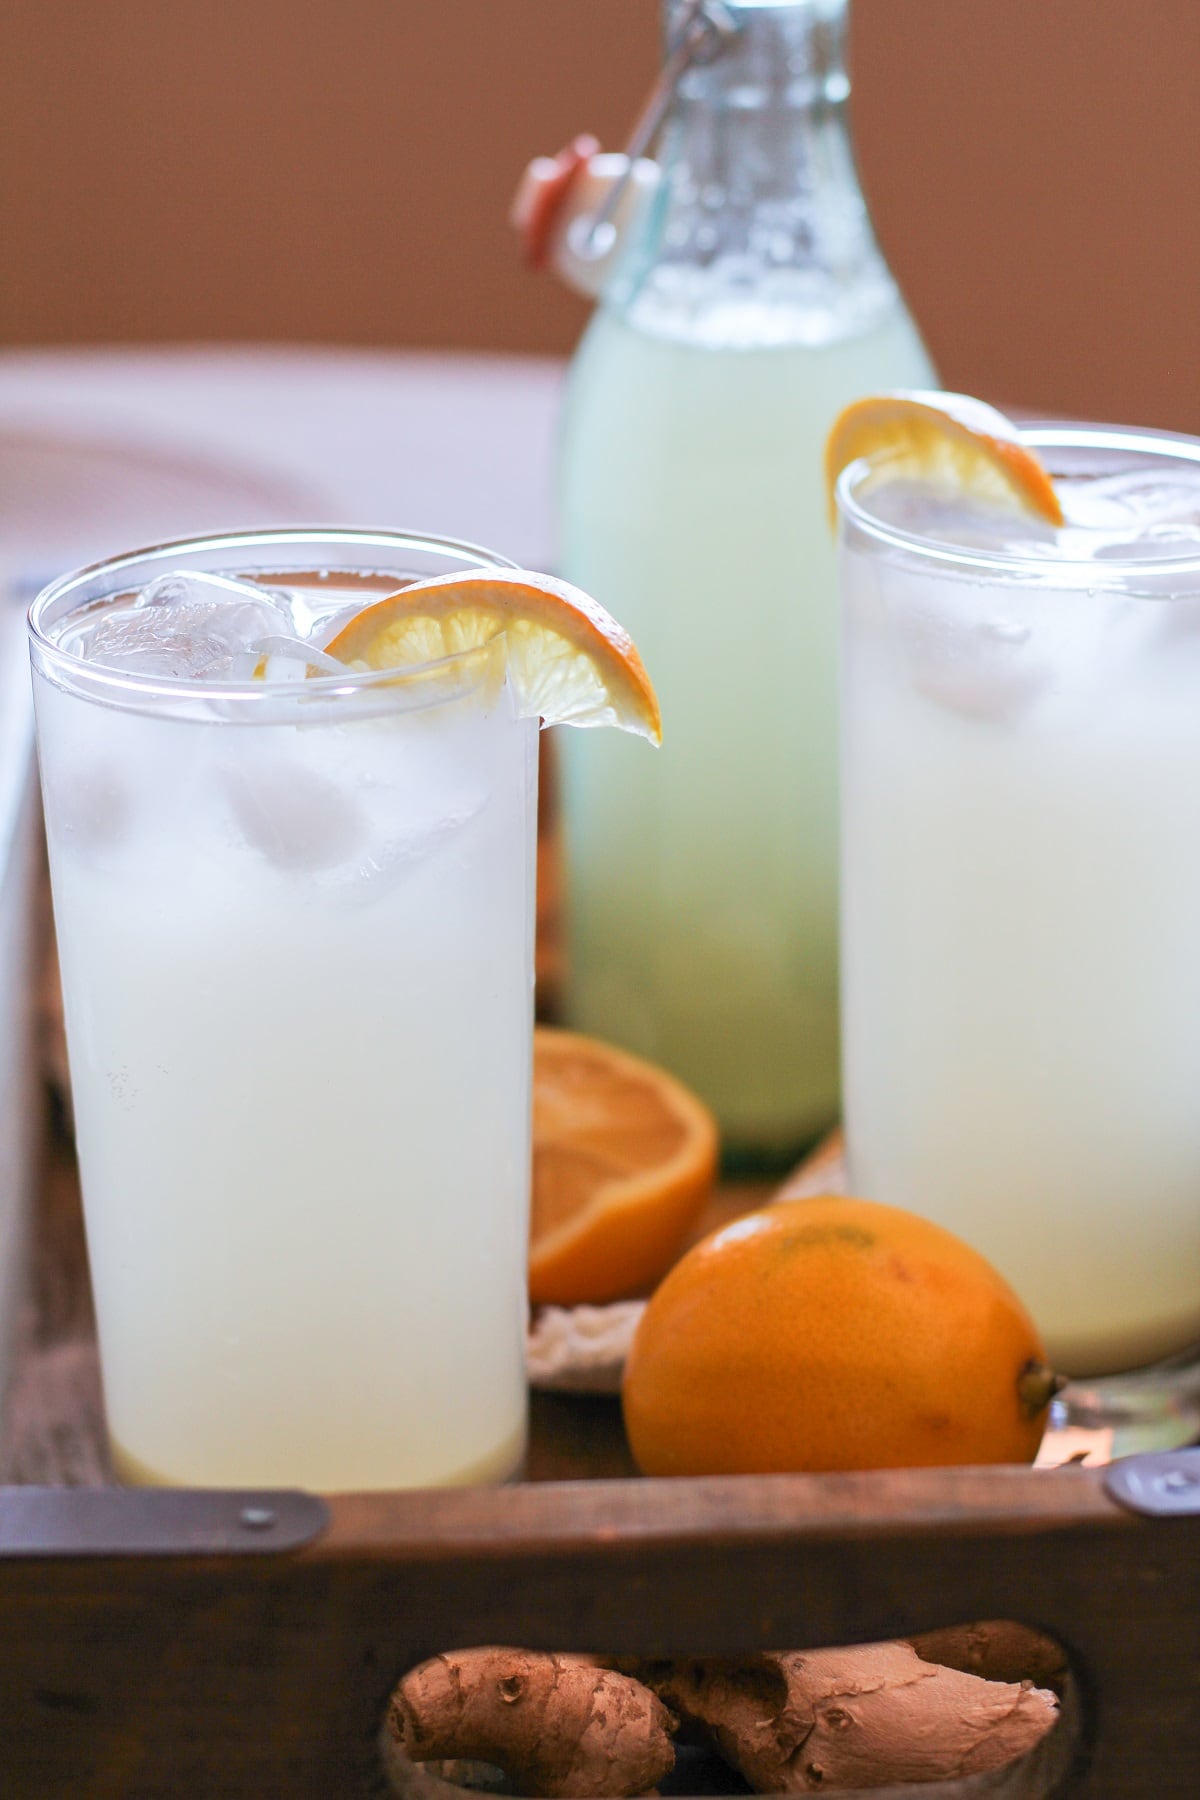
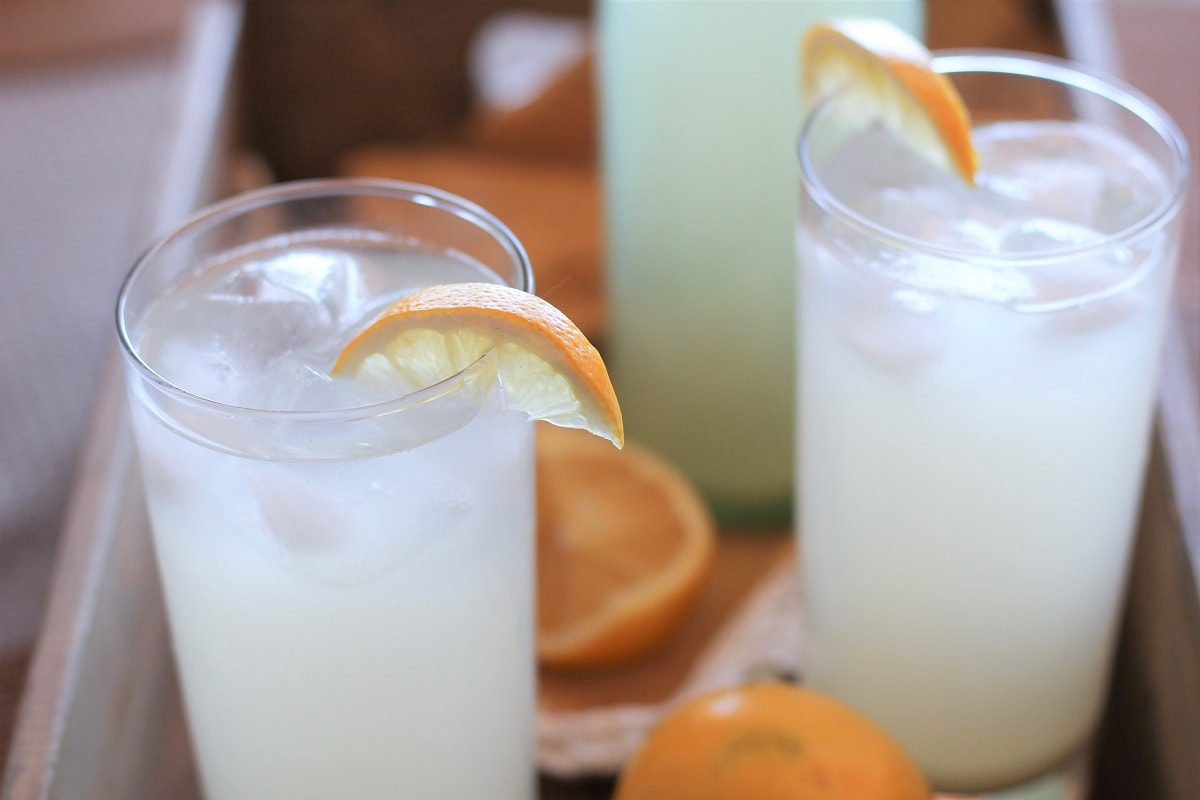
Enjoy the ginger beer as is or use it for cocktails or mocktails! I love it in my Strawberry Moscow Mules and my Cranberry Sauce Bourbon Cocktail!
While I was writing my cookbook, Delicious Probiotic Drinks, I had a great deal of fun with the ginger beer section – for me the challenge of making authentic ginger beer was even more interesting than brewing the perfect batch of kombucha.
Now go forth and ferment you some ginger juice.
My cookbook, Paleo Power Bowls, is now available! CLICK HERE to check it out, and thank you for your support!
If you make this ginger beer recipe, please feel free to share a photo and tag @The.Roasted.Root on Instagram!
Refreshing beverages for a warm day that takes little time, let’s go! Enjoy this homemade ginger ale!
How to Make Ginger Beer
Ingredients
- 9 cups (48oz) spring or well water
- ½ tsp (1.3g) cream of tartar*
- 1/3 cup (35g) fresh ginger peeled and grated
- 1/3 cup (79ml) fresh lemon juice**
- 1 cup (150g) granulated cane sugar***
- 1 tsp (3g) active dry yeast****
You Also Need:
- 1 2-liter plastic bottle with screw top (a large soda water bottle that has been carefully cleaned works great)
- A medium to large sized pot for heating water
Instructions
- Add the cream of tartar, lemon juice and fresh grated ginger to a large pot along with 4 cups of the water. Bring to a full boil.

- Turn the heat down to medium, add the sugar and stir until all of the sugar is dissolved.

- Add the rest of the (cold) water to the pot and allow it to cool to around 75 degrees F (23 degrees C). Stir in the yeast, stir and cover the pot with a kitchen towel. Place pot in a dark place for 3 hours.
- Using a fine strainer, strain the liquid into a pitcher to remove all the bits of ginger.

- Pour the brew into one clean 2-liter plastic bottle (or two 1-liter bottles) but do not fill up the bottle all the way because the fermentation will yield carbon dioxide, causing gases to build in the bottle – you will need to give the liquid some room to build the gas. Place the bottles in a dark, warm room for 2 to 3 days (two days if you want a sweeter ginger beer, and 3 days if you prefer a drier ginger beer).
- Once to three times a day, carefully loosen the caps to relieve some of the pressure (without opening the bottles all the way). Be very careful in this process and do not point the bottles at anyone’s (or your own face). After the ginger beer has finished brewing, store it in the refrigerator to chill. This will also slow the fermentation process.
- Pour in a glass and enjoy as is, or add a splash of rum and lime juice for a Dark n' Stormy. Ginger beer keeps for 10 days – be sure to store in air-tight bottles in your refrigerator.

Video
Notes
Nutrition
This post contains affiliate links, which means I make a small commission off items you purchase at no additional cost to you.
I originally shared this recipe on September 1, 2014. I updated the information and photos to make the tutorial even better.


I love ginger beer! I always buy it in my locall hispanic market but its quite expensive so I love the idea of making it at home. I can make something healthy and save money yeah! will try it tommorow and tell you how it was.
Ah great! I hope you love it and I look forward to hearing from you! xoxo
Absolutely stunning! Thank you on a detailed impressive recipe!
This is the second recipe I’ve tried, and the second time I’ve made this recipe. But, as with any recipe, I have to mess with a good thing.
I sliced the ginger the second time…trying to strain the grated was a PIA. I used 2/3 cup turbinado sugar bc that’s what I had. And red star premium curve yeast bc that’s what I had left from the previously tried recipe. Like it! Thank you!
My pleasure! Thanks for letting us know your changes! xoxo
I am regular reader of your articles and it will be great if you share more content on this topic
Your articles are extremely cool. I am glad to be here. I enjoyed reading your articles and I would like to bookmark your posts.
From beer brewing (many batches, but still less than 50, so certainly not an expert, and one time ginger beer brewer) I would recommend using a fermentation lock during the fermentation… this allows CO2 to escape, while keeping the fermentation vessel isolated from the bacterial nasties waiting to spoil your brew (basically bubble the output through a bleach bath – in such a way that the bleach does not get sucked back into the brew!) Fermentation is complete when the bubbling in the lock stops, rack it off the dead yeast, add a little more sugar and bottle, the yeast that is left will eat the new sugar, and carbonate the beverage. Exact quantities for correct pressure/carbonation TBD, but you can leave it unattended for the duration of fermentation. Much easier.
Hi. I enjoyed reading your recipe and all of the comments. I’m going to step it up a bit. I love the white vinegar bottles they sell at Costco. They’re 1.3 gallons (5 liters) thick plastic. I bought 2 different kinds of wine/beer yeast that top out at 18% ABV and also bought food grade yeast nutrient (1 tsp / gallon). I’m going to add 5-6 cups of sugar slightly over 1/4 tsp of 18% yeast that I first start in warm water for 20 minutes to rehydrate it and multiply. I will probably add a couple tablespoons of lemon juice. I have these bottles of ginger that come in a squeeze bottle. I think I have 3 or 4 unopened.(I just looked and for some reason I can’t find them). I’ll rip the house apart tomorrow looking for them or order new ones. I’m going to use probably 6-8 tablespoons of that. I will then leave about 3-4″ empty space in the neck of the bottle so it doesn’t overflow everywhere and cover with a paper towel and rubber band for about 5 days. Then I’m going to place a double bubbler on it and wait between 4-8 weeks.
I wish I could just use premade ginger ale (soda) and add extra sugar, extra ginger, and yeast, but the potassium benzoate (the preservative) would probably kill the yeast. Knowing me, I’ll probably try a 2 liter bottle that way too just to see if it’ll work.
Happy brewing all!
Your posts are really inspiring and useful for somebody like me who is planning a world travel. I think you deserve better attention on Google search rankings.
I made two batches already and it came out great. I tried adding a 1/4 cup extra sugar before fermentation but didn’t notice a change in sweetness. In any case, the grating is very laborious. Will I notice a difference if I use a food processor instead of a greater? Also you noted that the shelf life is 10 days. What happens after that (let’s say 14 days) if I keep it in the fridge? Does it self-destruct? How? No longer safe to drink?
Hi Ramy,
You can use a food processor or blender for the ginger, no problem 🙂 I note the shelf life as 10 days for safety purposes, but the ginger beer should actually last 3 to 4 weeks. Just be sure to give it a good sniff if you keep it for longer than 10 days to be sure it’s still good. Definitely keep it in the refrigerator 😀 Hope you enjoy, and happy brewing! xoxox
Hi lyn
I have made this drink at home. It is very delicious and jaw-dropping. Thank you for sharing this type of recipe to us. I loved it.
Hi I followed the recipe to the letter but my ginger beer is bitter! Any clues as to what went wrong.
Hi Lyn,
It sounds like the yeast did a great job of consuming all of the sugar! You can add a simple syrup or more sugar before refrigerating it if you’d like it to be sweeter. xo
Hi Julia
I tried this receipe twice, first time was excellent, and the drink had even that ginger kickback that i really enjoyed. But second time, came out yeasty, n soury. Think it could be because i overboiled w the lemon juice in it, kept it in bottles for 3 days as well? As all the other quantities were the same. I am currently making it a third time now, and very careful to off the heat, immediately after dissolving the sugars. Can’t wait to try this third batch! Read your earlier comments about reducing the yeast, may try this too!
Hi there!
Yes, it sounds like your yeast ate up the majority of the sugar, so you could take a number of approaches for the next batch –
1.) use less yeast
2.) use more sugar
3.) brew for less time (1 to 2 days instead of 3).
You could try a combination of all three, but it may be best to start with one change so you know where the success is coming from 😀
Hi I made this and doubled the quantities, all was fine first day, releasing gas a few times a day, on fourth day, when I went to try it, there was no fizz and it tasted like fault gingery, lemony water?
Where did I go wrong?
Is there a way I can revive the batch?
I.e. Add more sugar / yeast?
Many thanks
Hi Roger,
It sounds like the yeast ate up all the sugar and then died off. If it were me, I would start over fresh because if there’s no fizz it is very likely there is nothing living in the ginger beer 🙁 Since it died on the 4th day, I would say refrigerate the ginger beer after day 2 or 3 to avoid the yeast eating up all of the sugar. Let me know if you have any other questions!
Thanks for sharing the info, I really enjoyed reading your blog, you have lots of great information.
I made this- had a load of baker’s yeast at the back of the cupboard that I’d bought a few years ago in bulk when going through a baking phase and that I wasn’t sure was still good.
Anyway, it turned out that the yeast was still active- if not quite as active as it used to be- and I ended up with a delicious, dry ginger beer.
I fermented it in a stainless steel mini-keg thinking that it wouldn’t explode- which it didn’t- however the pressure inside the keg was often high enough that opening it was near impossible, and I had to use the vise in my workshop to grip the top while I turned the keg enough for the gas to blow the rubber seal and escape! I’ve stored the finished ginger beer in my fridge in swing-top liter bottles that I got from a local brewery that also have rubber seals that should hopefully blow before the bottle explodes.
The next batch will be fermented in a 1 gallon glass carboy with a Spunding valve attached- which is basically a blow-out valve where you set the maximum pressure manually. It’s a system I use for carbonating beer at home naturally rather than force-carbonating using a carbon dioxide tank. With any luck this will result in a carbonated ginger beer but reduce the chances of any explosions or messes.
Presumably beer yeast could be used instead of baking yeast in this recipe?
Hi Pete,
This gave me a good chuckle 😀 Thank you for providing feedback on your method! It appears as though many people have had success with both beer yeast and champagne yeast, so I believe it will work nicely. Feel free to report back on future brews. xo
Hi Julia,
I finished the first batch- partly drunk on its own and partly with the addition of home-made sour mix and vodka as Moscow Mules.
So I’ve started a second batch. Rather than risk exploding carboys in the kitchen- at least for now- I bought a 128 oz stainless steel mini-keg from Amazon- at a surprisingly reasonable price- that has a pressure valve built into the cap which seemed like a much more sensible option.
I’ve tweaked your recipe a little too.
I didn’t peel the ginger but just grated it from frozen using a box grater- which seems to work well.
I added the zest of two lemons along with the pulp left over after juicing the lemons to the initial pan with the water, ginger etc and simmered it gently for about 10 minutes after it came to the boil- just to be on the safe side and make sure it was sterile- then added the lemon juice after taking it off the heat.
I might extend that to 15 minutes in future as that seems to be the recommended standard for maximising flavour when brewing beer if you are adding aromatics to the kettle towards the end of the hop boil- such as flavouring a dark stout with root ginger or licorice.
I used ice cubes rather than cold water to bring it up to its final volume- in an effort to force-cool it to the right temperature. Still needed to sit for about 90 minutes but the initial temperature drop was about 60°C
After leaving it for three hours for fermentation to get started I then strained it through a fine-mesh conical sieve- the sort that’s normally used for making bisque or stocks- as you can force the liquid through with a wooden spoon and leave everything else inside.
The ginger beer is sitting on the worktop happily fermenting away and it’s a very simple matter to release the carbon dioxide without having to use anything from the workshop- although I hold a cloth round the valve when I release the pressure as there can be a bit of an aerosol effect. It appears to be a very active fermentation which surprises me given the age of the yeast which is at least two years past its use-by date, but which has been stored in a warm, dark, dry place ever since I bought it.
I’ve been looking at your other ginger beer recipe that uses the ginger bug and might give that a try some time, but for now I think I’m more comfortable sticking with fermentation projects that use packaged yeast rather than wild fermentation. Can the ginger bug starter be refrigerated to slow it down, then removed from the fridge a day or two before use to bring it back up to speed? Or would storing it in a cooler part of the house- such as the garage or the basement- be a better idea?
Incidentally I originally found your site while Googling ‘brewed ginger beer recipes’ or something very similar, but I’ve enjoyed having a look around. There’s plenty here to keep me busy experimenting for a while.
Best wishes.
Hi Pete!
Thank you for the half-drunk note and for sharing your changes! All of that sounds brilliant – I love the idea of adding lemon zest and pulp, and am happy to hear the ginger beer is fermenting merrily.
For the wild yeast version, I like your idea of moving the starter to a cooler spot (like the garage) but not necessarily the refrigerator to slow fermentation. The only reason being this version is difficult to get started, so I would hate for you to have a successful starter and then risk loosing any probiotics if they get too cold and sluggish 😉 It’s worth the experimentation, but I’d say if you’re attached to keeping the starter alive, best to be cautious.
Thanks again for contributing, and happy brewing!! xoxoxo
I would like to make your easy probiotic ginger beer recipe, but there is no yeast available at this time. I have sourdough starter for making bread, but I am not sure how much to use in place of 1 tsp of active dry yeast in your recipe. Would you have any idea? Hope you can help thanks.
Hi jeff,
Oh, that’s a great question and a creative idea. I have no clue if it will work with sourdough starter, as I’ve never tried fermenting a drink using it. If it were me, I would begin with a tablespoon and see where that takes me. You may need to experiment. Happy brewing!