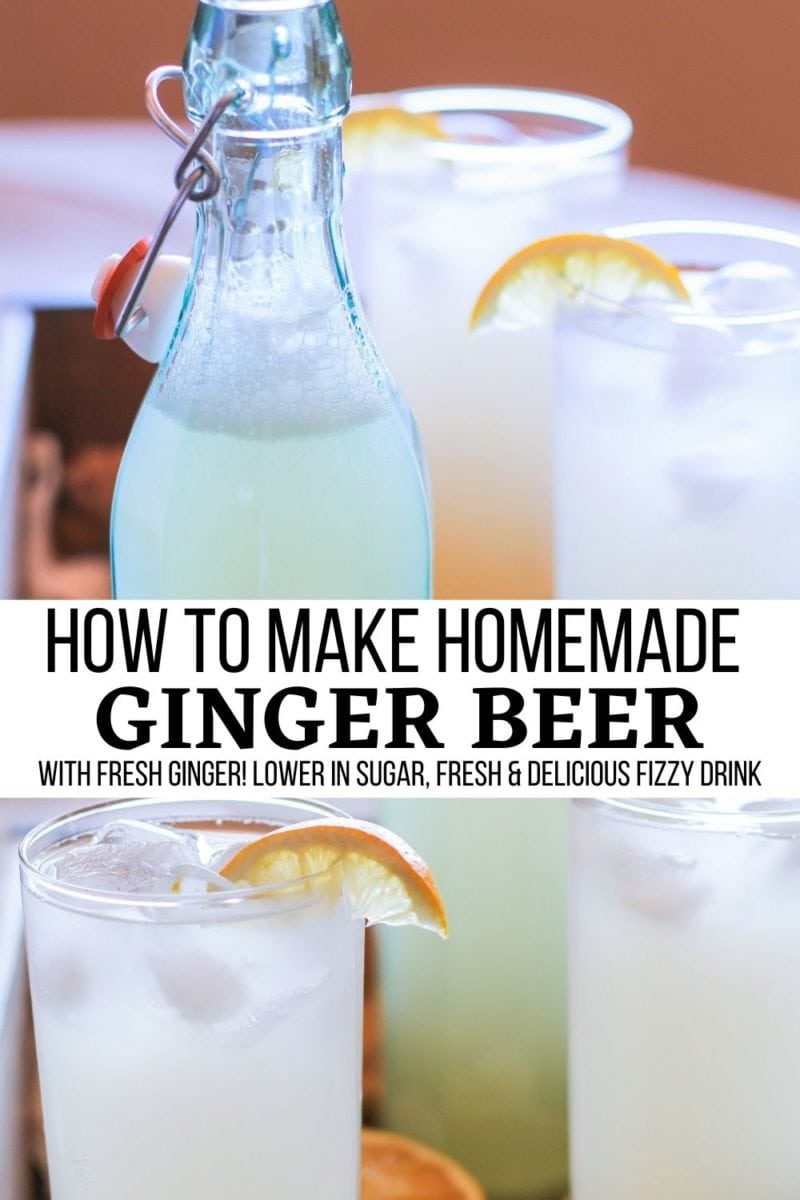
How to make homemade ginger beer, including photos and a video! This simply recipe is lower in sugar than store-bought ginger beer, contains vitamins and probiotics, and is a healthier alternative to most carbonated drinks because it contains less sugar and no carbonated water.

Ginger beer has been all the rage for years, and for a very good reason.
The sweet and spicy beverage is tasty by itself and adds pep to all sorts of cocktails and mocktails. If you’re anything like me, you could add ginger beer to all of your cocktails from now until doomsday.
Most of us think of ginger beer in the context of the Dark n’ Stormy or Moscow Mule and other cocktails that involve the brew. But did you know you can make a stellar homemade ginger ale at home, and not only is it easy, but it’s also great for you?
Because we like to do things in the legit-est of ways, we’re going to put on our DIY cap and learn how to make fermented ginger beer at home.
And it’s going to be healthier than the store-bought version, because that’s the way we roll.
Types of Homemade Ginger Beer Recipes:
There are several ways to make ginger beer.
Method #1: Most people make a simple syrup using ginger, sugar, and water, and then combine the simple syrup with soda water or seltzer water.
While this is the least time consuming way of making ginger beer, and definitely comes out tasting great, we can take it a step farther by fermenting ginger beer into a healthful drink so that it contains less sugar but still tastes sweet.
Method #2: The old fashioned way uses a “ginger bug” or “ginger starter,” which is ginger that has fermented in sugar and water to the point that its natural enzymes and probiotics are released.
Once a ginger bug is formed, it is then brewed into a batch of ginger brew, which results in a probiotic-rich effervescent drink.
This method of making ginger beer takes between 4 and 6 weeks, and is the method I describe in my cookbook, Delicious Probiotic Drinks.
I have also posted a tutorial on How to Make Probiotic Ginger Beer on this site for real ginger beer. Check it out if you’re looking for a beverage with a higher concentration of probiotics.
It is also an alcoholic ginger beer that has a tiny amount of alcohol but can be fermented in such a way that increases the alcohol content.
Method #3 (this recipe): The method I’m sharing in this post uses regular baker’s yeast.
The yeast consumes the sugar as it reproduces, which means that while the finished product tastes sweet, it is actually very low in sugar. Plus, it contains so much delicious ginger flavor!
Which Type of Ginger Beer To Make:
The quickest way is Method #1 listed above, which will require a recipe outside of this blog post.
Whether you choose to make this easy ginger beer recipe laid out in this post or my probiotic ginger beer is a matter of personal preference (and time).
For those of us who want ginger beer quickly, this easy version only takes 3 days from start to finish.
It still has health benefits from the yeast, but because it is not fermented for as long as the authentic version, it isn’t as probiotic-rich.
Is There Any Alcohol in Ginger Beer?
As with any fermentation process, a small amount of alcohol results.
The alcohol content in this ginger beer recipe is very low, almost non-existent.
Still, if you need to avoid alcohol, it is best to be safe and stick with a non-alcoholic ginger beer.
Ingredients Needed for Ginger Beer:
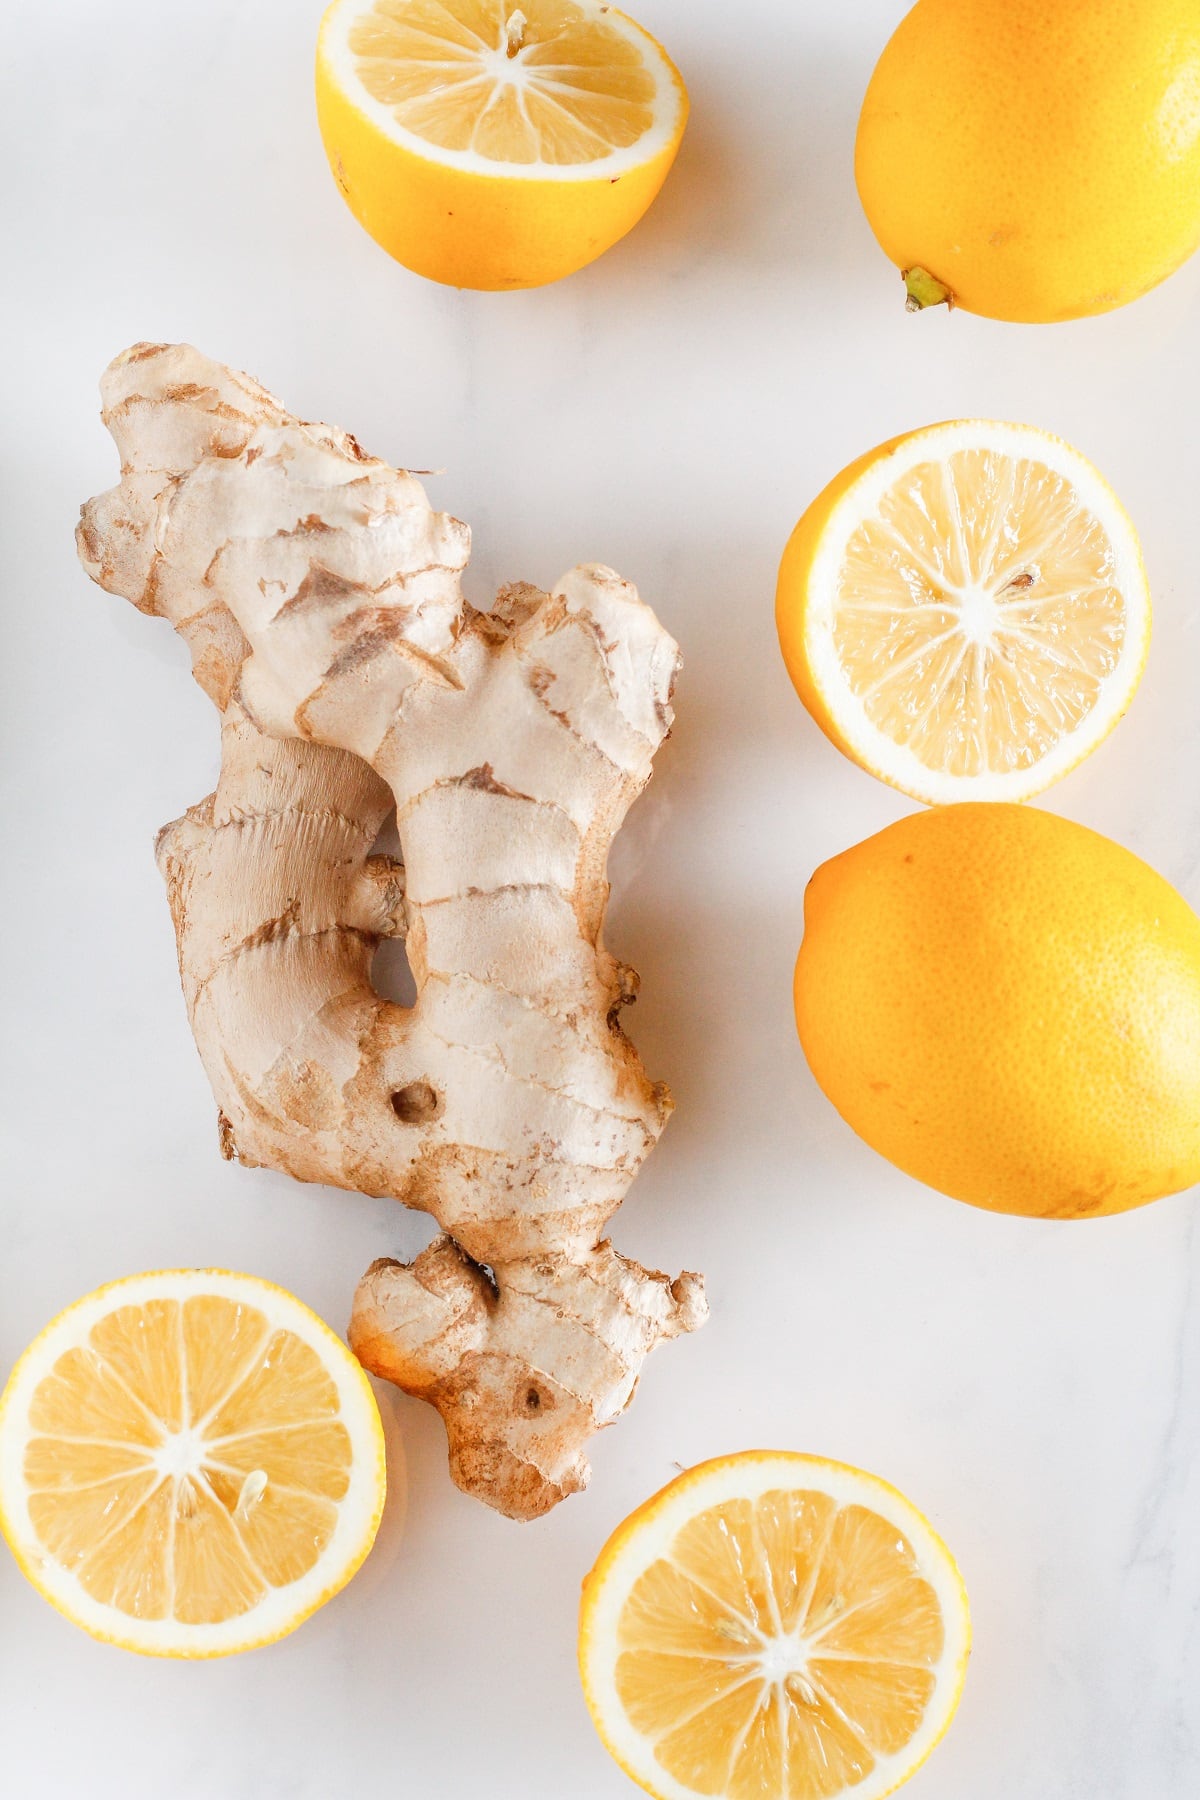
All it takes is fresh grated organic ginger, cream of tartar, lemon juice, active dry yeast, and cold water.
You can replace the lemon juice with lime juice if you’d like. I always go with organic fresh ginger root because it contains plenty of natural bacteria and natural yeasts for the best ginger beer.
Some people add brewer’s yeast (beer yeast) or champagne yeast to this recipe to boost the activity and alcohol content.
I don’t personally have experience with either one so can’t offer advice on how much to use or how to employ it, but if you’re interested in stepping up your brew, they are worth looking into!
I have also heard some people use sourdough starter to make ginger beer, but I have no experience with this either.
Health Benefits of Ginger Beer:
Ginger is a root and has been used as a natural remedy for upset stomach and nausea across many civilizations for hundreds of years.
It is a natural anti-inflammatory and digestive aid.
Studies show fresh ginger prevents and fights several types of cancer cells including breast, colon, ovarian, prostate, and lung cancer.
Ginger is also known for cleansing the body of toxic chemicals, as it is full of antioxidants.
When fermented, ginger releases enzymes and probiotics, which help maintain healthy gut microflora.
So is ginger beer really good for you?
Based on its ability to lower inflammation, aid with digestion, and boost your body’s immune system, yes, ginger beer is good for you.
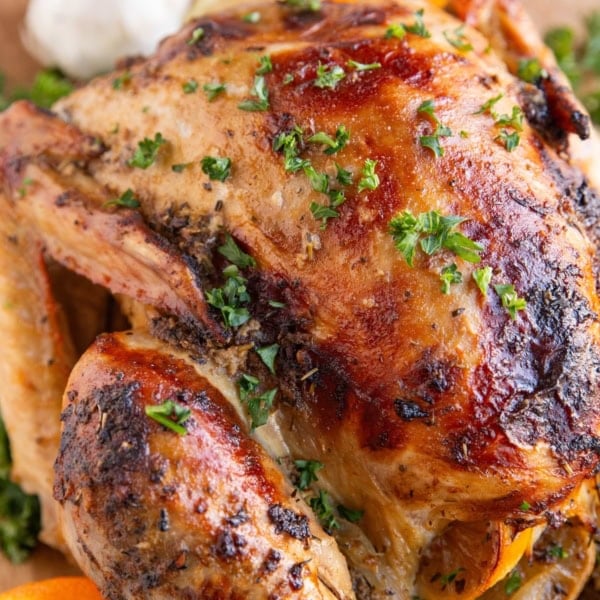
Now that we have all of the details laid out, let’s learn how to make ginger beer!
How to Make Ginger Beer:
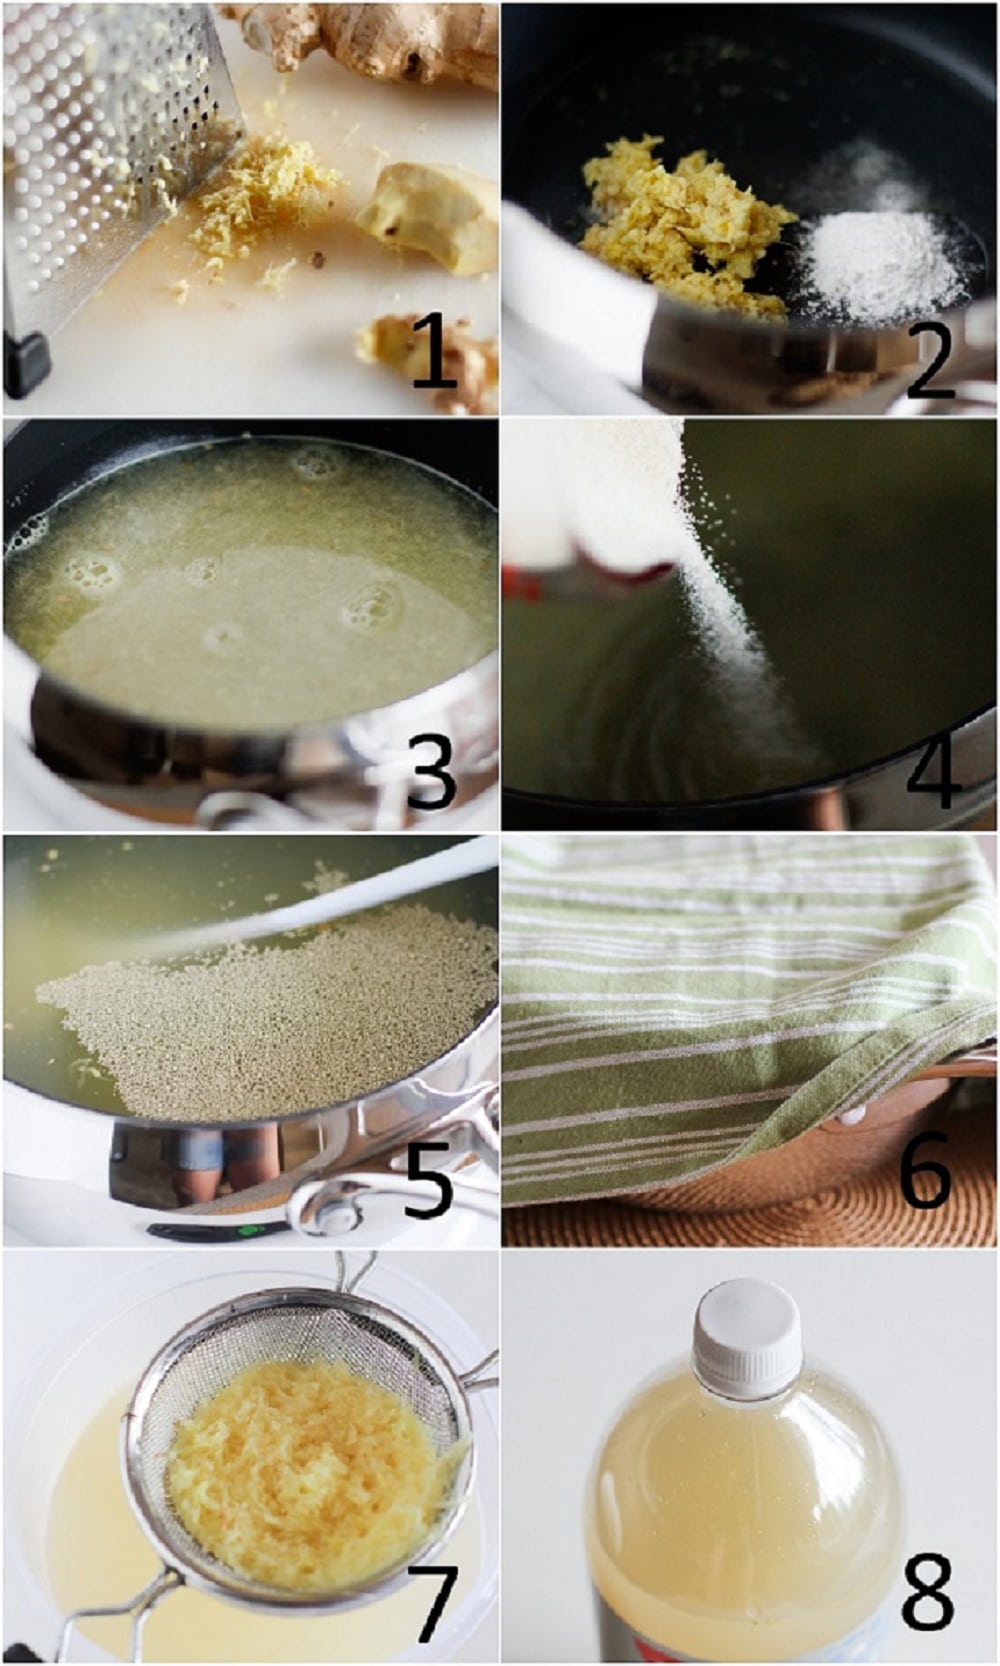
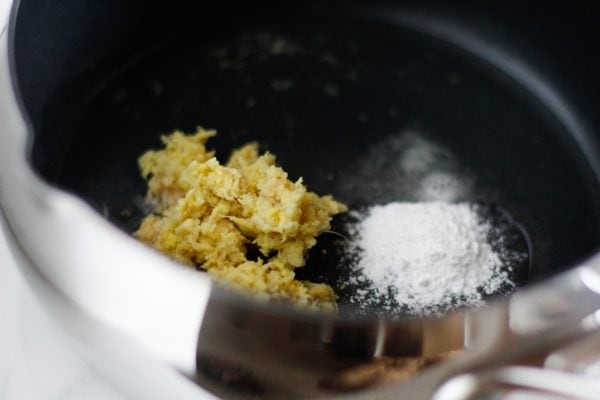
- Peel and grate the fresh ginger using a box grater. You want about 1/4 cup of grated ginger.
- Add the cream of tartar (1/2 teaspoon), lemon juice (1/4 cup), and ginger to a large pot.
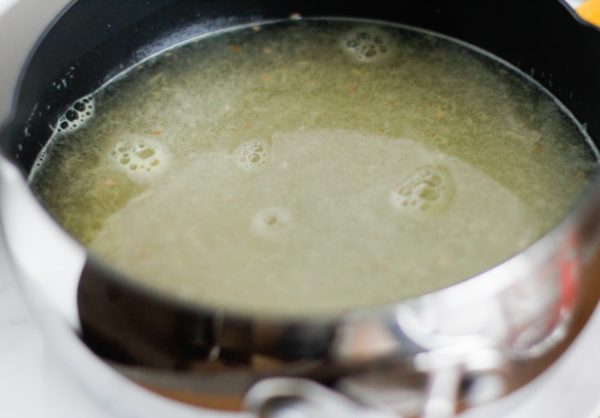
- Add 4 cups of water, and bring the mixture to a full boil.
- Turn the heat down to medium, add the sugar and stir until all of the sugar is dissolved.
- Add the rest of the cold water to the pot (5 cups) and allow it to cool to around 75 degrees Fahrenheit (23 degrees Celsius). Add the yeast (1 teaspoon), stir well.
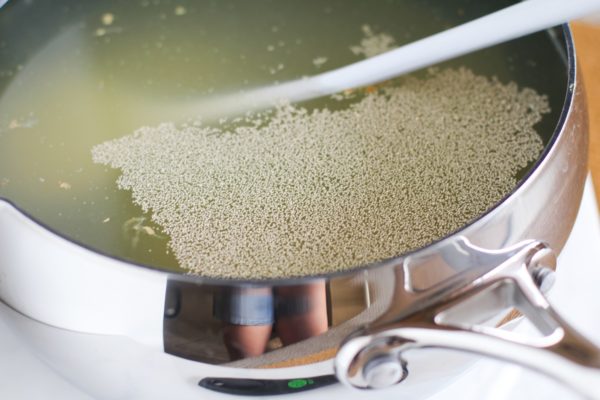
- Cover the pot with a kitchen towel and place in a warm, dark part of your house for 3 hours. The mixture should smell gingery and yeasty!
- Using a fine strainer, coffee filter, or a fine-mesh sieve, strain the liquid into a large pitcher to remove all the bits of ginger.
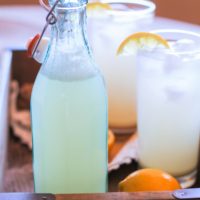
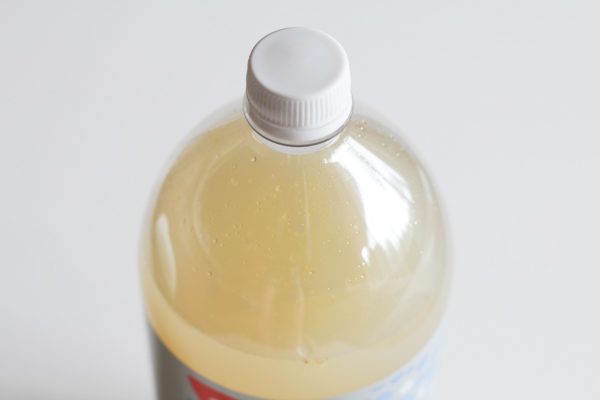
- Pour this strain mixture into a clean 2-liter plastic bottle. Empty soda water bottles work perfectly, and you can also use 2 one-liter bottles. Do not fill up the bottles all the way because the fermentation will yield carbon dioxide.
Place the plastic soda bottles in a dark place (ideally a warm room or warm place) for a couple of days.
One to three times a day, carefully loosen the caps to relieve some of the pressure without opening the bottles all the way.
The drink becomes very pressurized and fizzy, so skipping this step could result in a ginger beer bottle explosion. True story.
Be very careful in this process and do not point the bottles at anyone’s (or your own) face.
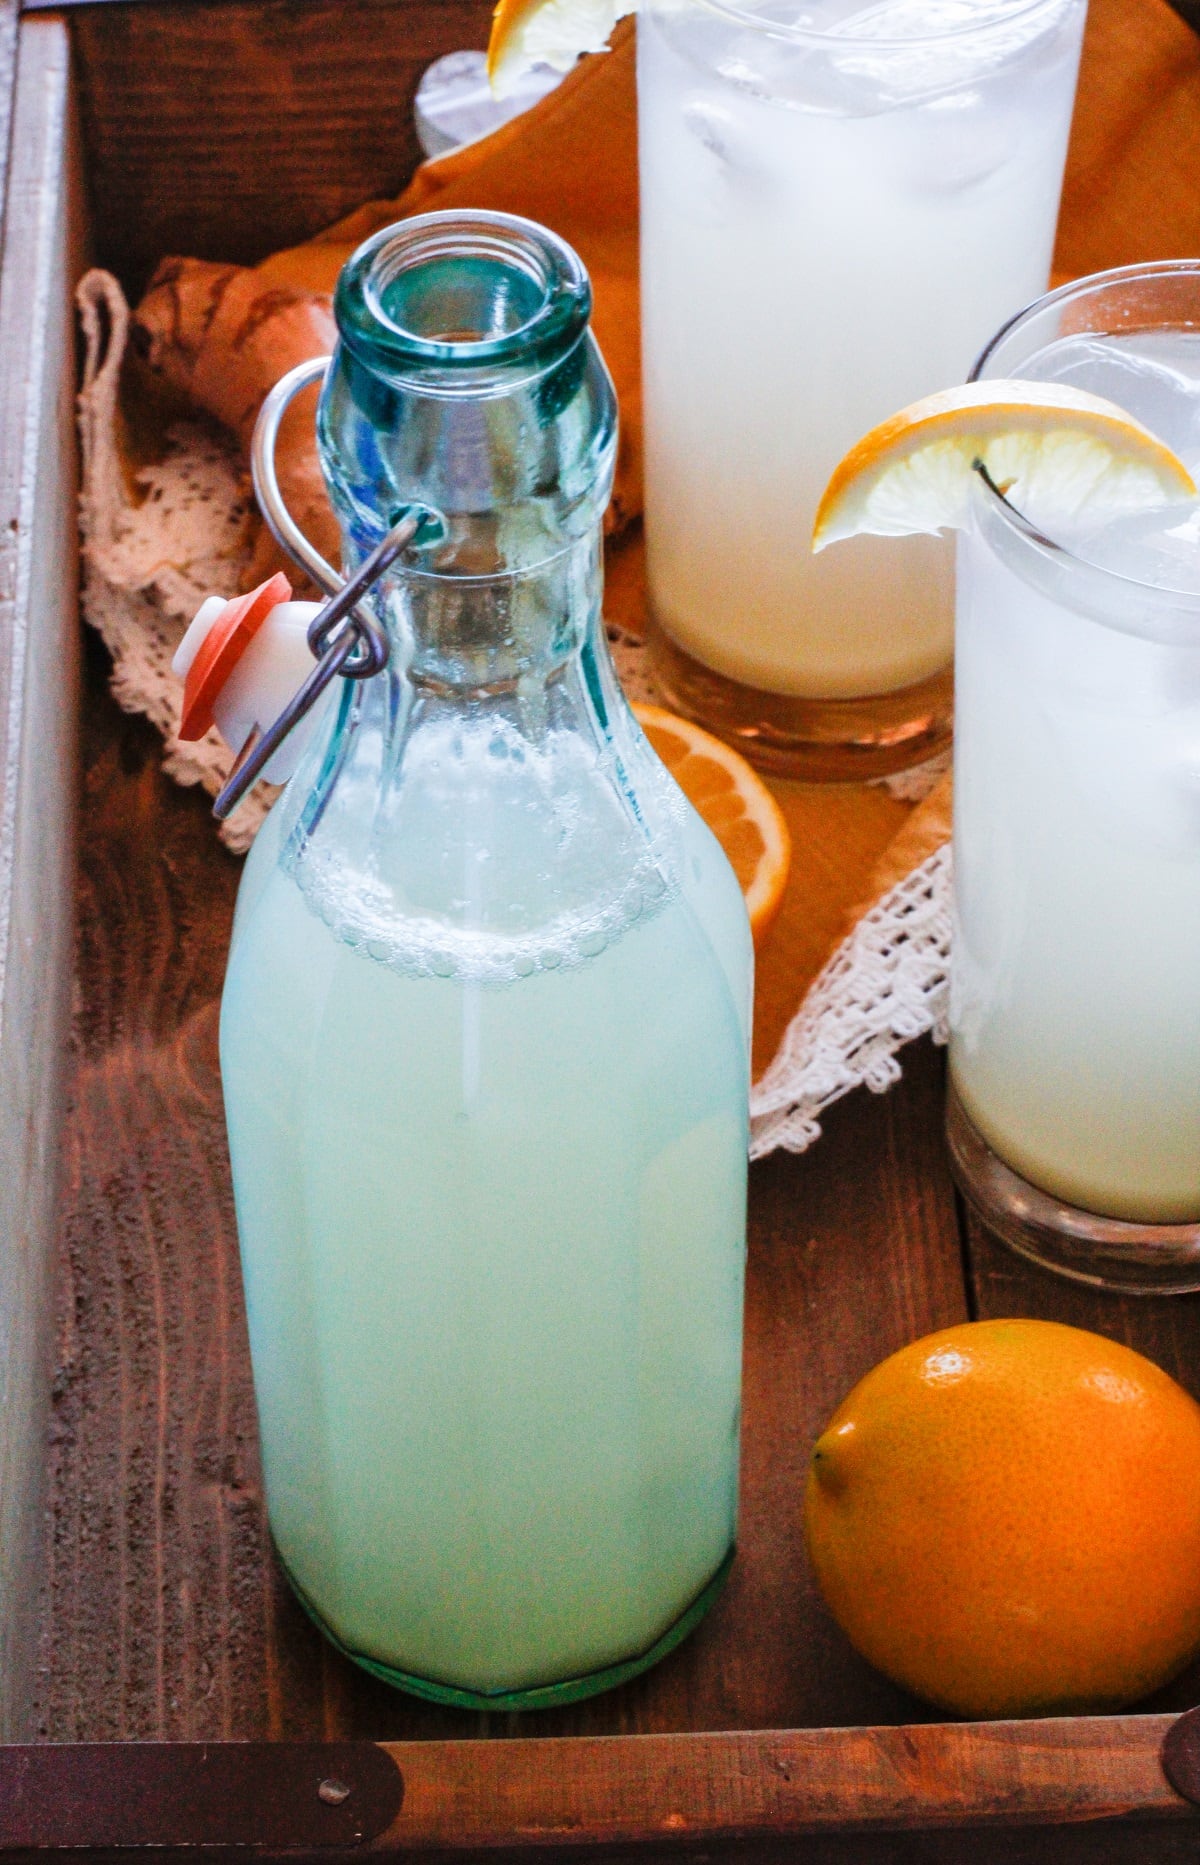
After your brew has finished fermenting, you can either add fruit, simple syrup, juice, or liquor to it to create a customized treat, or drink it as is.
If you choose to bottle the ginger beer in glass bottles, allow the ginger beer to lose much of its fizz prior to bottling, as it will continue to carbonate in the bottles.
This could result in them exploding if there is too much pressure.
Important Notes:
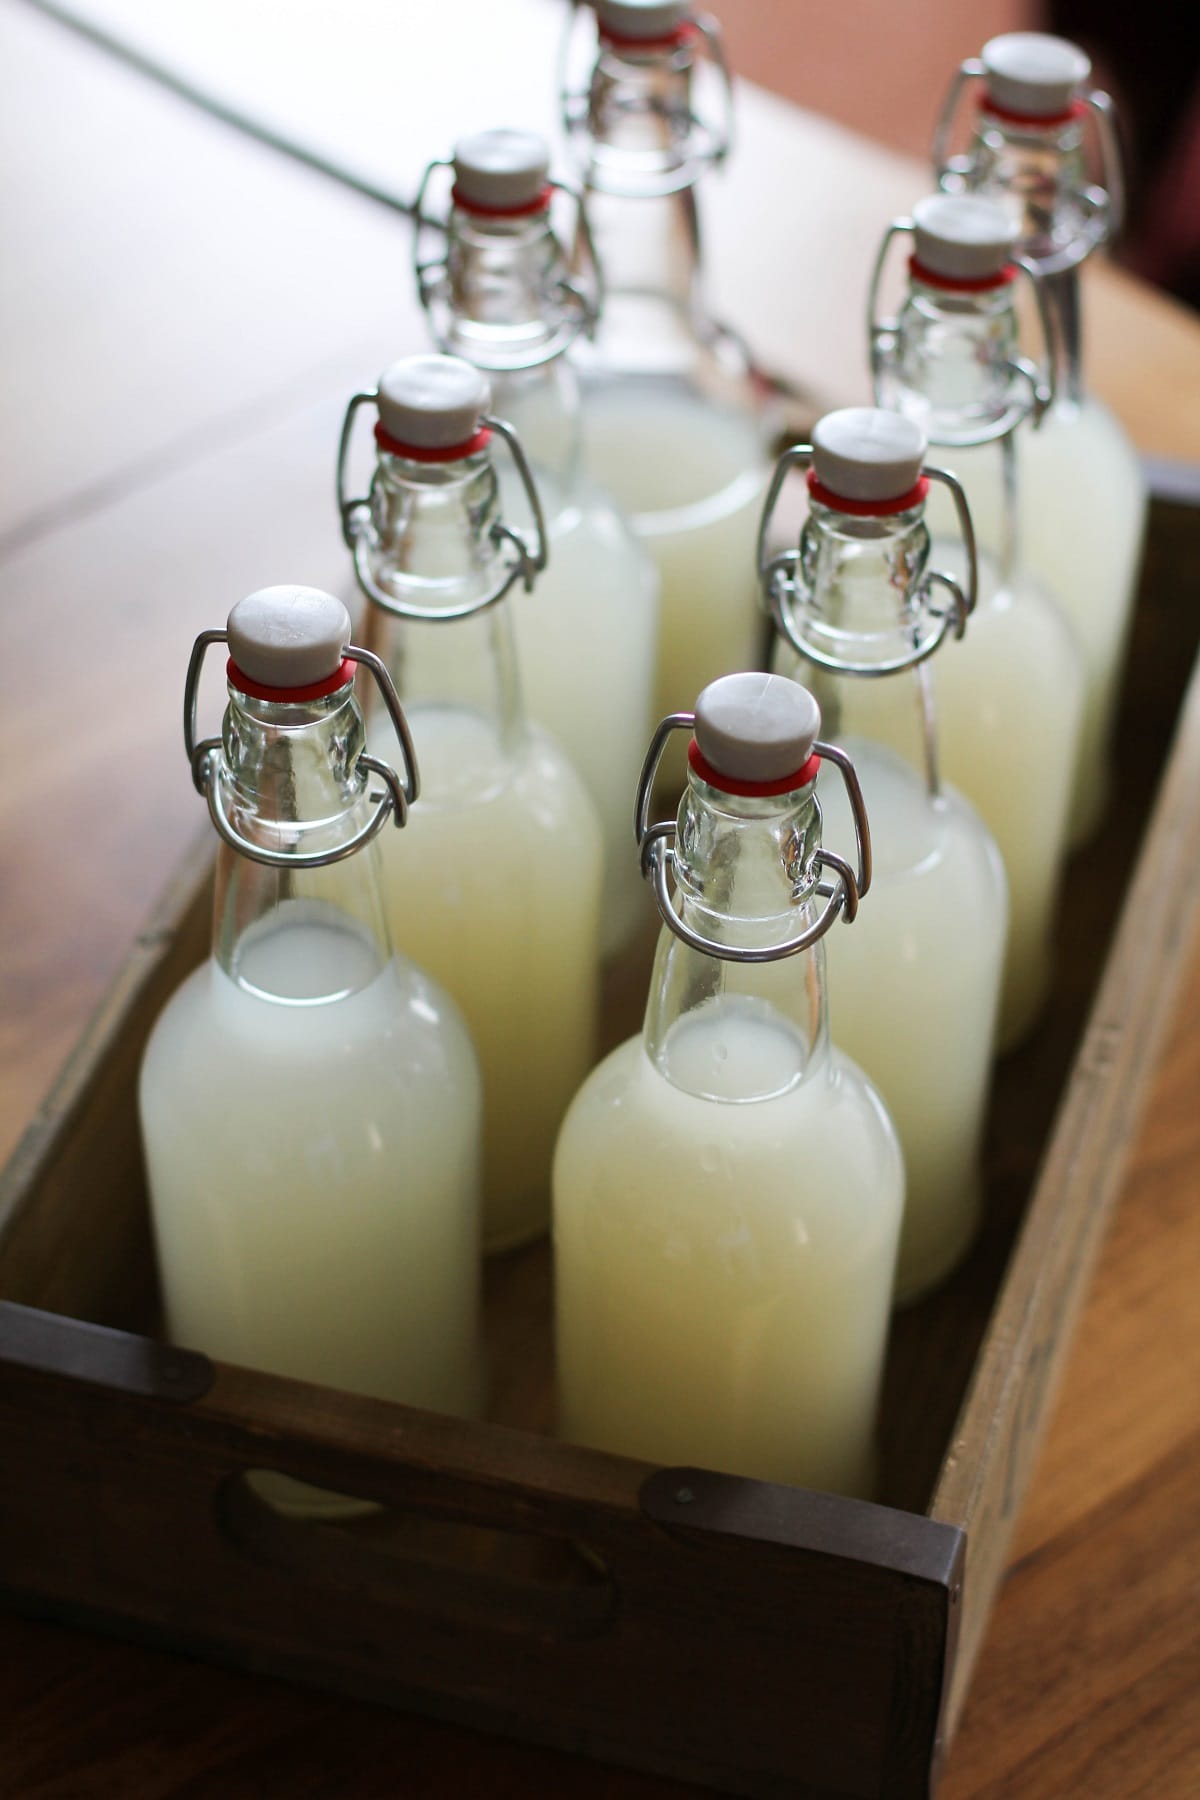
During fermentation, DO NOT use glass bottles, because the glass can explode under pressure (yes, it builds up that much pressure!), be sure to use plastic bottles with screw tops, as noted in the recipe, so that you can relieve pressure during fermentation.
After 24 hours, you will notice yeast colonies on top of the liquid and settled at the bottom. This is normal!
Once the ginger beer has finished fermenting, glass bottles may be used for bottling and storing.
You must be very careful when opening the bottles because the beverage will still be very carbonated. Always point glass bottles away from your face or anyone else’s face while opening.
The longer you allow the brew to ferment, the more sugar will be metabolized by the yeast, resulting in a less sweet, drier beverage.
I recommend storing finished ginger beer in the refrigerator and always away from direct sunlight.
Depending on the time of year and the room temperature, the brew may take more or less time to ferment. If the room is particularly cool, it could take an extra day or two to finish fermenting, whereas if it very warm, it could take less than 48 hours.
How to Make Sweeter, Spicier Ginger Beer:
If you prefer a sweeter beverage, consider fermenting the ginger beer for one to two days only or simply start with more sugar (about 1 1/4 to 1 1/2 cups instead of 1 cup) than you need.
For spicy ginger beer, start out with double the amount of ginger for a kick. Make your own ginger beer based on your personal taste!
How to Store Ginger Beer:
Once the ginger beer has finished its few-day brewing process, store it in the refrigerator for 10 days, or up to 1 month when left untouched.
You can either store it in the same plastic bottle you used to brew it, or transfer it into glass flip cap bottles. I play it safe and store it in the same plastic bottle I use for fermentation.
Just note that the more you open the bottle, the more carbonation will be lost.
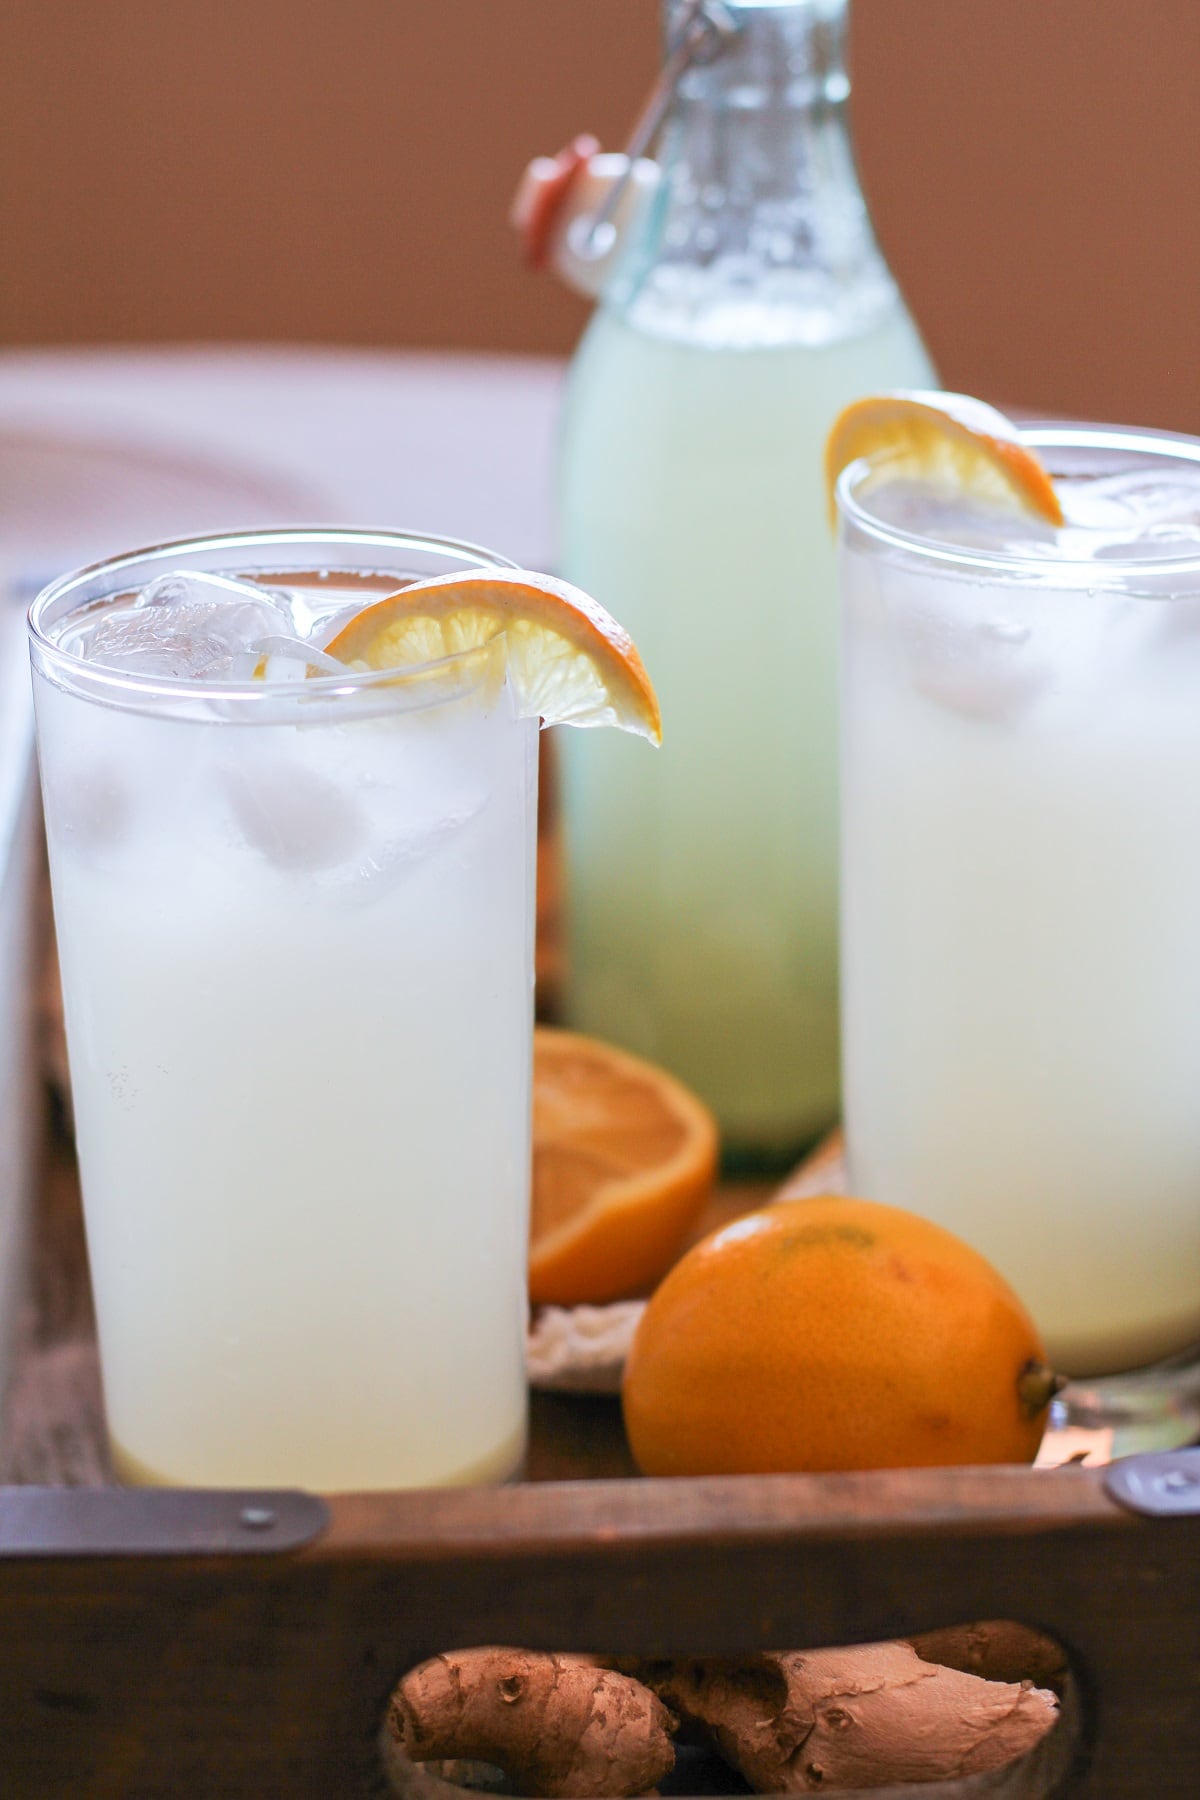
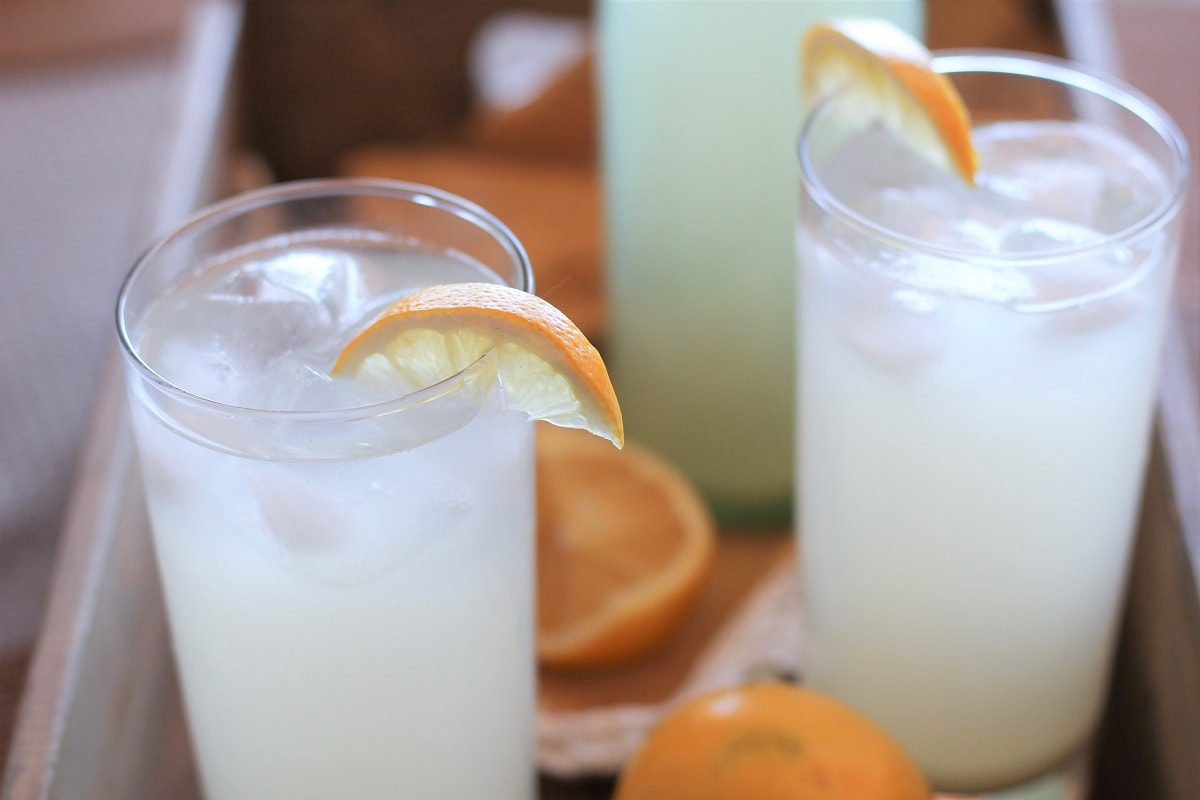
Enjoy the ginger beer as is or use it for cocktails or mocktails! I love it in my Strawberry Moscow Mules and my Cranberry Sauce Bourbon Cocktail!
While I was writing my cookbook, Delicious Probiotic Drinks, I had a great deal of fun with the ginger beer section – for me the challenge of making authentic ginger beer was even more interesting than brewing the perfect batch of kombucha.
Now go forth and ferment you some ginger juice.
My cookbook, Paleo Power Bowls, is now available! CLICK HERE to check it out, and thank you for your support!
If you make this ginger beer recipe, please feel free to share a photo and tag @The.Roasted.Root on Instagram!
Refreshing beverages for a warm day that takes little time, let’s go! Enjoy this homemade ginger ale!
How to Make Ginger Beer
Ingredients
- 9 cups (48oz) spring or well water
- ½ tsp (1.3g) cream of tartar*
- 1/3 cup (35g) fresh ginger peeled and grated
- 1/3 cup (79ml) fresh lemon juice**
- 1 cup (150g) granulated cane sugar***
- 1 tsp (3g) active dry yeast****
You Also Need:
- 1 2-liter plastic bottle with screw top (a large soda water bottle that has been carefully cleaned works great)
- A medium to large sized pot for heating water
Instructions
- Add the cream of tartar, lemon juice and fresh grated ginger to a large pot along with 4 cups of the water. Bring to a full boil.

- Turn the heat down to medium, add the sugar and stir until all of the sugar is dissolved.

- Add the rest of the (cold) water to the pot and allow it to cool to around 75 degrees F (23 degrees C). Stir in the yeast, stir and cover the pot with a kitchen towel. Place pot in a dark place for 3 hours.
- Using a fine strainer, strain the liquid into a pitcher to remove all the bits of ginger.

- Pour the brew into one clean 2-liter plastic bottle (or two 1-liter bottles) but do not fill up the bottle all the way because the fermentation will yield carbon dioxide, causing gases to build in the bottle – you will need to give the liquid some room to build the gas. Place the bottles in a dark, warm room for 2 to 3 days (two days if you want a sweeter ginger beer, and 3 days if you prefer a drier ginger beer).
- Once to three times a day, carefully loosen the caps to relieve some of the pressure (without opening the bottles all the way). Be very careful in this process and do not point the bottles at anyone’s (or your own face). After the ginger beer has finished brewing, store it in the refrigerator to chill. This will also slow the fermentation process.
- Pour in a glass and enjoy as is, or add a splash of rum and lime juice for a Dark n' Stormy. Ginger beer keeps for 10 days – be sure to store in air-tight bottles in your refrigerator.

Video
Notes
Nutrition
This post contains affiliate links, which means I make a small commission off items you purchase at no additional cost to you.
I originally shared this recipe on September 1, 2014. I updated the information and photos to make the tutorial even better.


Hi there, I love ginger beer. I have just read most of the content of your page. I am a Diabetic and as such, I am looking for the lowest sugar content as possible, with out compromising the recipe. Can you help[ me? Kindest regards Mike
Hi Mike,
It’s difficult to test the residual sugar of ginger beer after it is finished fermenting unless you have the proper equipment (which may be a bit pricy for homebrewing). I would hate for you to try the recipe and have a negative reaction to it, but I will say the beverage is very low in sugar at the end. If you let it sit the full 3 days once bottled, you’ll end up with a very dry ginger beer, which should be super low in sugar. You can replace the cane sugar with coconut sugar, which is lower glycemic, but unfortunately you can’t use a sugar-free sweetener. I hope this helps! xoxo
Thanks for all the effort you take explaining and supporting. Brilliant recipe. And for the info on the sugar. Please. After bottling the yeast version does one still has to release pressure? I would also like to achieve the driest possible due to diabetics but don’t want an explosion.
Karen
Hi Karen, after bottling, you do need to release pressure for at least 2 to 3 days in order to avoid explosion. Once you refrigerate the ginger beer, you won’t need to release the pressure as the activity of the yeast will slow. Hope this helps!
I have some rubber “things” with nipples to use with mason jar lids on glass jars when fermenting veggies. They slowly release gasses. Do you think I could ferment this in a glass jar if I use those?
Hi Lesley,
I’ve never tested the recipe myself using those types of jars, so I can’t be sure. I truly wouldn’t advise it given how pressurized the ginger beer becomes. xoxo
Hi,
In your one instruction you have 1/4 lemon juice and 1/4 grated ginger and then in the other instruction you have 1/3 grated ginger and 1/3 lemon juice. Which one should it be?
And when you release carbon while it is fermenting how much do you let out?
Do you let all of the gas out or just a bit?
thanks,
Can I replace the cane sugar with xylitol has so many health benefits!
Hi Adria, xylitol won’t feed the yeast the way regular sugar does, so I would advise against it. xo
Personally don’t boil the ginger as it kills off good yeast attached. Make a syrup ,allow to cool,add cider yeast + grated ginger including skin.ferment for 7 -10 days.this should get to 4/6%alc. Strain.add 1/4teaspoon sugar\honey to each bottle for carbonation.ready in 2/3days or passterize for extra self life.
Love this idea! I’ve never made coconut rice before… pinning for later!
I meant I make double Julia’s quantity not double Mrs Beeton’s!
I don’t understand why this ginger beer should only keep for 10 days, what will happen if you keep it for longer and how can you tell if it has gone off? There is a very similar recipe in Mrs Beeton’s Household Management but she uses 3 gallons of water and says this will fill 4 dozen ginger-beer bottles – and this was before we had fridges! Because I make double this quantity I haven’t got room for it all in the fridge. Also she stands it with the yeast for 24 hours before bottling which is what I do.
My first batch tasted more like cloudy lemonade than ginger beer so I now use less lemon and at least double the amount of ginger which was a huge improvement.
I’ve made this 3 times in last 3 weeks. For me, reducing the yeast by half and increasing the sugar to 1.5 cups makes perfect ginger beer!
I also recommend using young ginger if you can find it in an Asian market- less fibrous & easier to peel 😉
Love it! Thanks for letting us know, Mike!! xo
Using the above recipe with 1-1/4 cups of sugar (as I like sweet drinks) I find it is still fermenting 5 days later and I am still relieving the pressure every 6 hours. Do I have to wait until it has completely stopped fermenting before transferring it to glass bottles or do I bottle it while still fizzy, please?
Roger
Hi Roger,
You only need to ferment the beverage for 2 to 3 days (2 days for a sweeter ginger beer, 3 days for a drier ginger beer). You want the beverage to stay bubbly, so simply transfer it to the fridge after 2 or 3 days and drink whenever you’re ready 😀
Longer fermentation = higher alcohol . Wait till it’s slowed down.
I don’t even taste any ginger in it. Doesn’t even taste sweet. Nothing like Bundaberg’s. It tastes exactly like beer. Does it have alcohol in it?
Thanks for sharing the steps of making Ginger Beer. I am fond of having beers on a daily basis and I am health conscious too. I use this thing of quitting the beer but couldn’t. I sure the steps will definitely help me out.
Hello! I’ve read all the posts and am just wondering if one can substitute honey for the sugar. I love using honey as a substitute and would like to in this. What do you think?
Hi Rhonda,
I’ve never tested the ginger beer using anything other than cane sugar so I can’t be sure it would work. My guess is it would work, as I’ve activated yeast for bread using honey in the past. Let me know if you try it! 😀
Holy Mother of God!!! Day Two of room temp burping… had my husband loosen the cap since it scared me on the first day. This time (second time on second day) it surprised him! Shot off and made a very loud pop that scared my dog too! Now I’m thinking maybe I should just continue buying the expensive Fever Tree Ginger Beer that we love so much. I had read the comments from some people but still was surprised at the reaction. Is this normal? It is VERY dangerous, a lot more than I was expecting 🙂 Hopefully it will taste good after all this… I used bottled lemon juice and Active Dry Yeast so I may prefer to sub out real lemon juice and beer yeast (if I have the guts to try this again, lol).
Hi Lynda,
Did you make any changes to the recipe? For instance, did you use more sugar or yeast, or did you use less water? Just want to be sure I have a clear picture 😀 I never experienced a loud pop or shooting…just lots of fizz. If you feel the process is unsafe, definitely don’t take any chances…it’s certainly not worth frightening you or your husband. xoxo
Thank you. The only change I made was to add about 8 ice cubes when trying to get temp down to 75 degrees. I was taking several hours because I used room temp water for the 5 cups instead of cold water. I was all stored on one 3L plastic jug.
Would this produce alcohol if I let it sit longer than the 3 hours before bottling?
Hi Nicholas,
It will produce a small amount of alcohol if you let it ferment longer in the bottles – if you want to take this approach, use more sugar (I’d try 1.5 cups) so that the yeast and probiotics have more to feed off of. I wouldn’t allow it to ferment for longer than 3 to 4 days, and please do remember to continue releasing the pressure! That being said, you won’t end up with a substantial amount of alcohol. If you’re looking for more alcohol, you can go an entirely different route using brewing equipment and champagne yeast. Let us know how it turns out! xo
Can we use this recipe and ferment for a few weeks? To be honest, I’ve been burping this stuff daily for about a week but am brain fogged from school studies and lost track of the date- realized its been over a week ?. Yet reading other fermentation boards it seems I might be okay- it just won’t have any sugar, won’t be sweet yet it will be highly probiotic if I ferment up to 6 weeks? Is this right?
HELP!
Hi Christy, for this particular recipe, I wouldn’t recommend such a long fermentation. I would strongly suggest sticking to the 2-3 day fermentation period and immediately refrigerate after that.
There is a way you can make ginger beer that requires much longer fermentation, but it is an entirely different method. It involves making a “ginger bug” using a lot of fresh ginger, sugar and water. You create a probiotic-rich starter by allowing these ingredients to sit at room temperature for a week and once the starter is ready you make a full brew.
The full details on how to make this are in my book, Delicious Probiotic Drinks. I may pot a how-to on this site at some point, but I have found ginger beer tends to be one of the more difficult beverages to brew when it doesn’t have the help of yeast.
All of this to say, under the right recipe, a long brew time is fine, but with the one in this post, you want to keep it short. I wouldn’t recommend drinking it if you aren’t sure whether or not it’s still good. I hope this helps! Let me know if you have any more questions! xo
Okay,thank you for that. so to clarify further, the ginger beer is pretty much garbage or pretty much moonshine at this point? 😉 I just hate to throw it away if I can have some use for it. I do see little bubbles forming everyday, but I have not had any crazy bubbling going on that would make bottles explode. I have however, kept the lids lightly sealed so gas can escape on its own, even though I have been burping daily.
there is no mold, there is light sediment at bottom, I pureed my ginger in a nutrimix machine and then strained the mixture so there was no pulp.
I smelled it yesterday, does not smell bad at all, not too sweet, no foul odor, maybe the SLIGHTEST alcohol smell starting?
I guess I just hate to throw out the whole batch and wondered if it’s good or worth saving for anything?
Hi Christine,
Yes, I would discard it. If there’s ever any question as to whether or not a homemade probiotic drink is spoiled or not, I always say toss it…it isn’t worth making yourself uncomfortable or sick over.
i got garbage can from walmart washed it with bleach put few pds ginger an 6 lemons in food thingy ground it up boiled that in canning pan let it cool threw in some old yeast been in fridge since yr one an filled it with water o three 2 pd bags sugar sry um cream of tarter for fizz so up to you i prefer not to eat stuf dont know nothing much about dip cup in or bottle whatever probably better than buying beer for you